
Attaching to the Drone
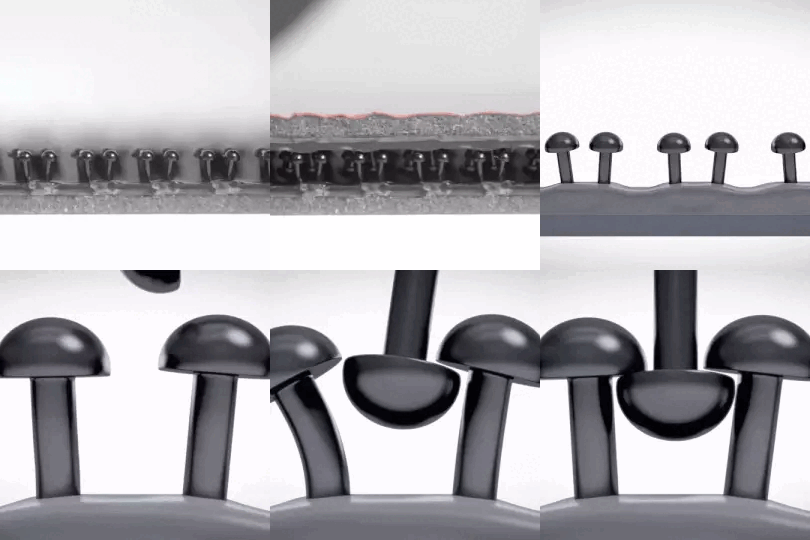
The Mini uses a 3M Dual Lock reclosable fastener to be quickly & safely attached and detached from your drone. The Dual Lock holds firm when mated. The interlocking mushroom-shaped heads slide past each other to close with a snap and peel apart easily when you need to separate them by simply pulling the strips by hand.
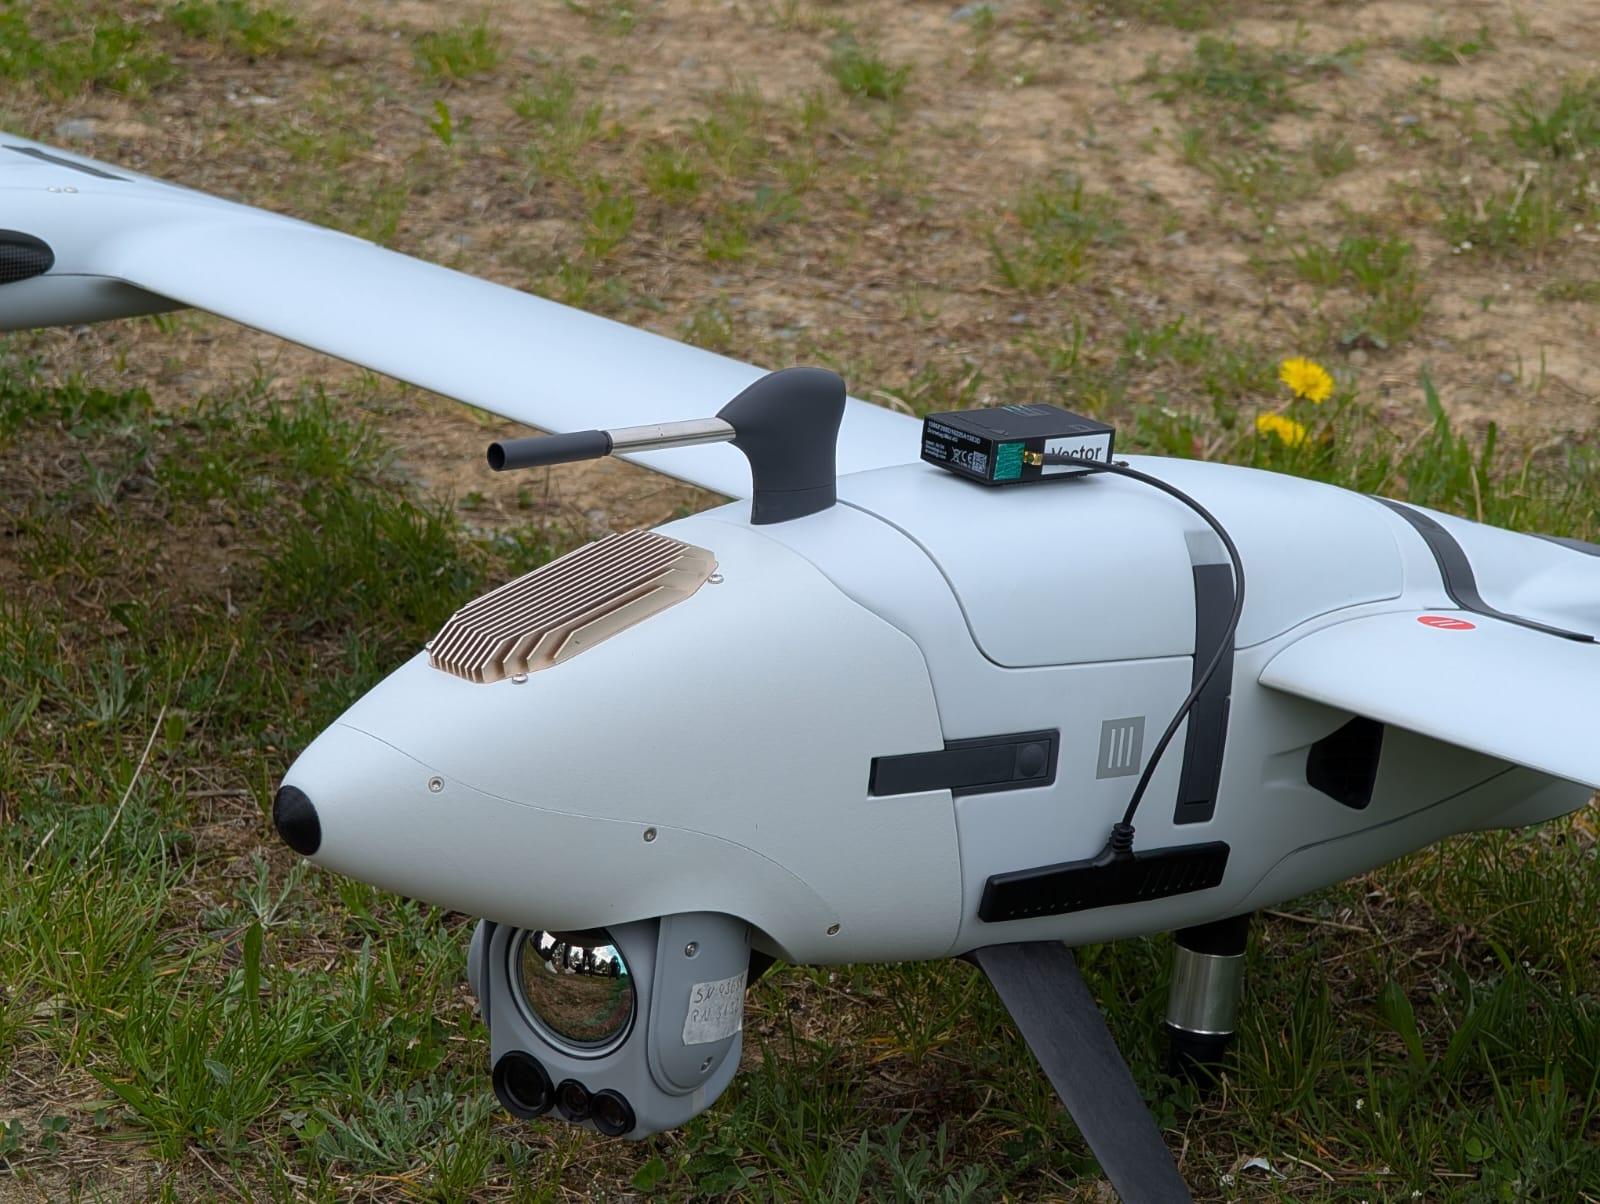
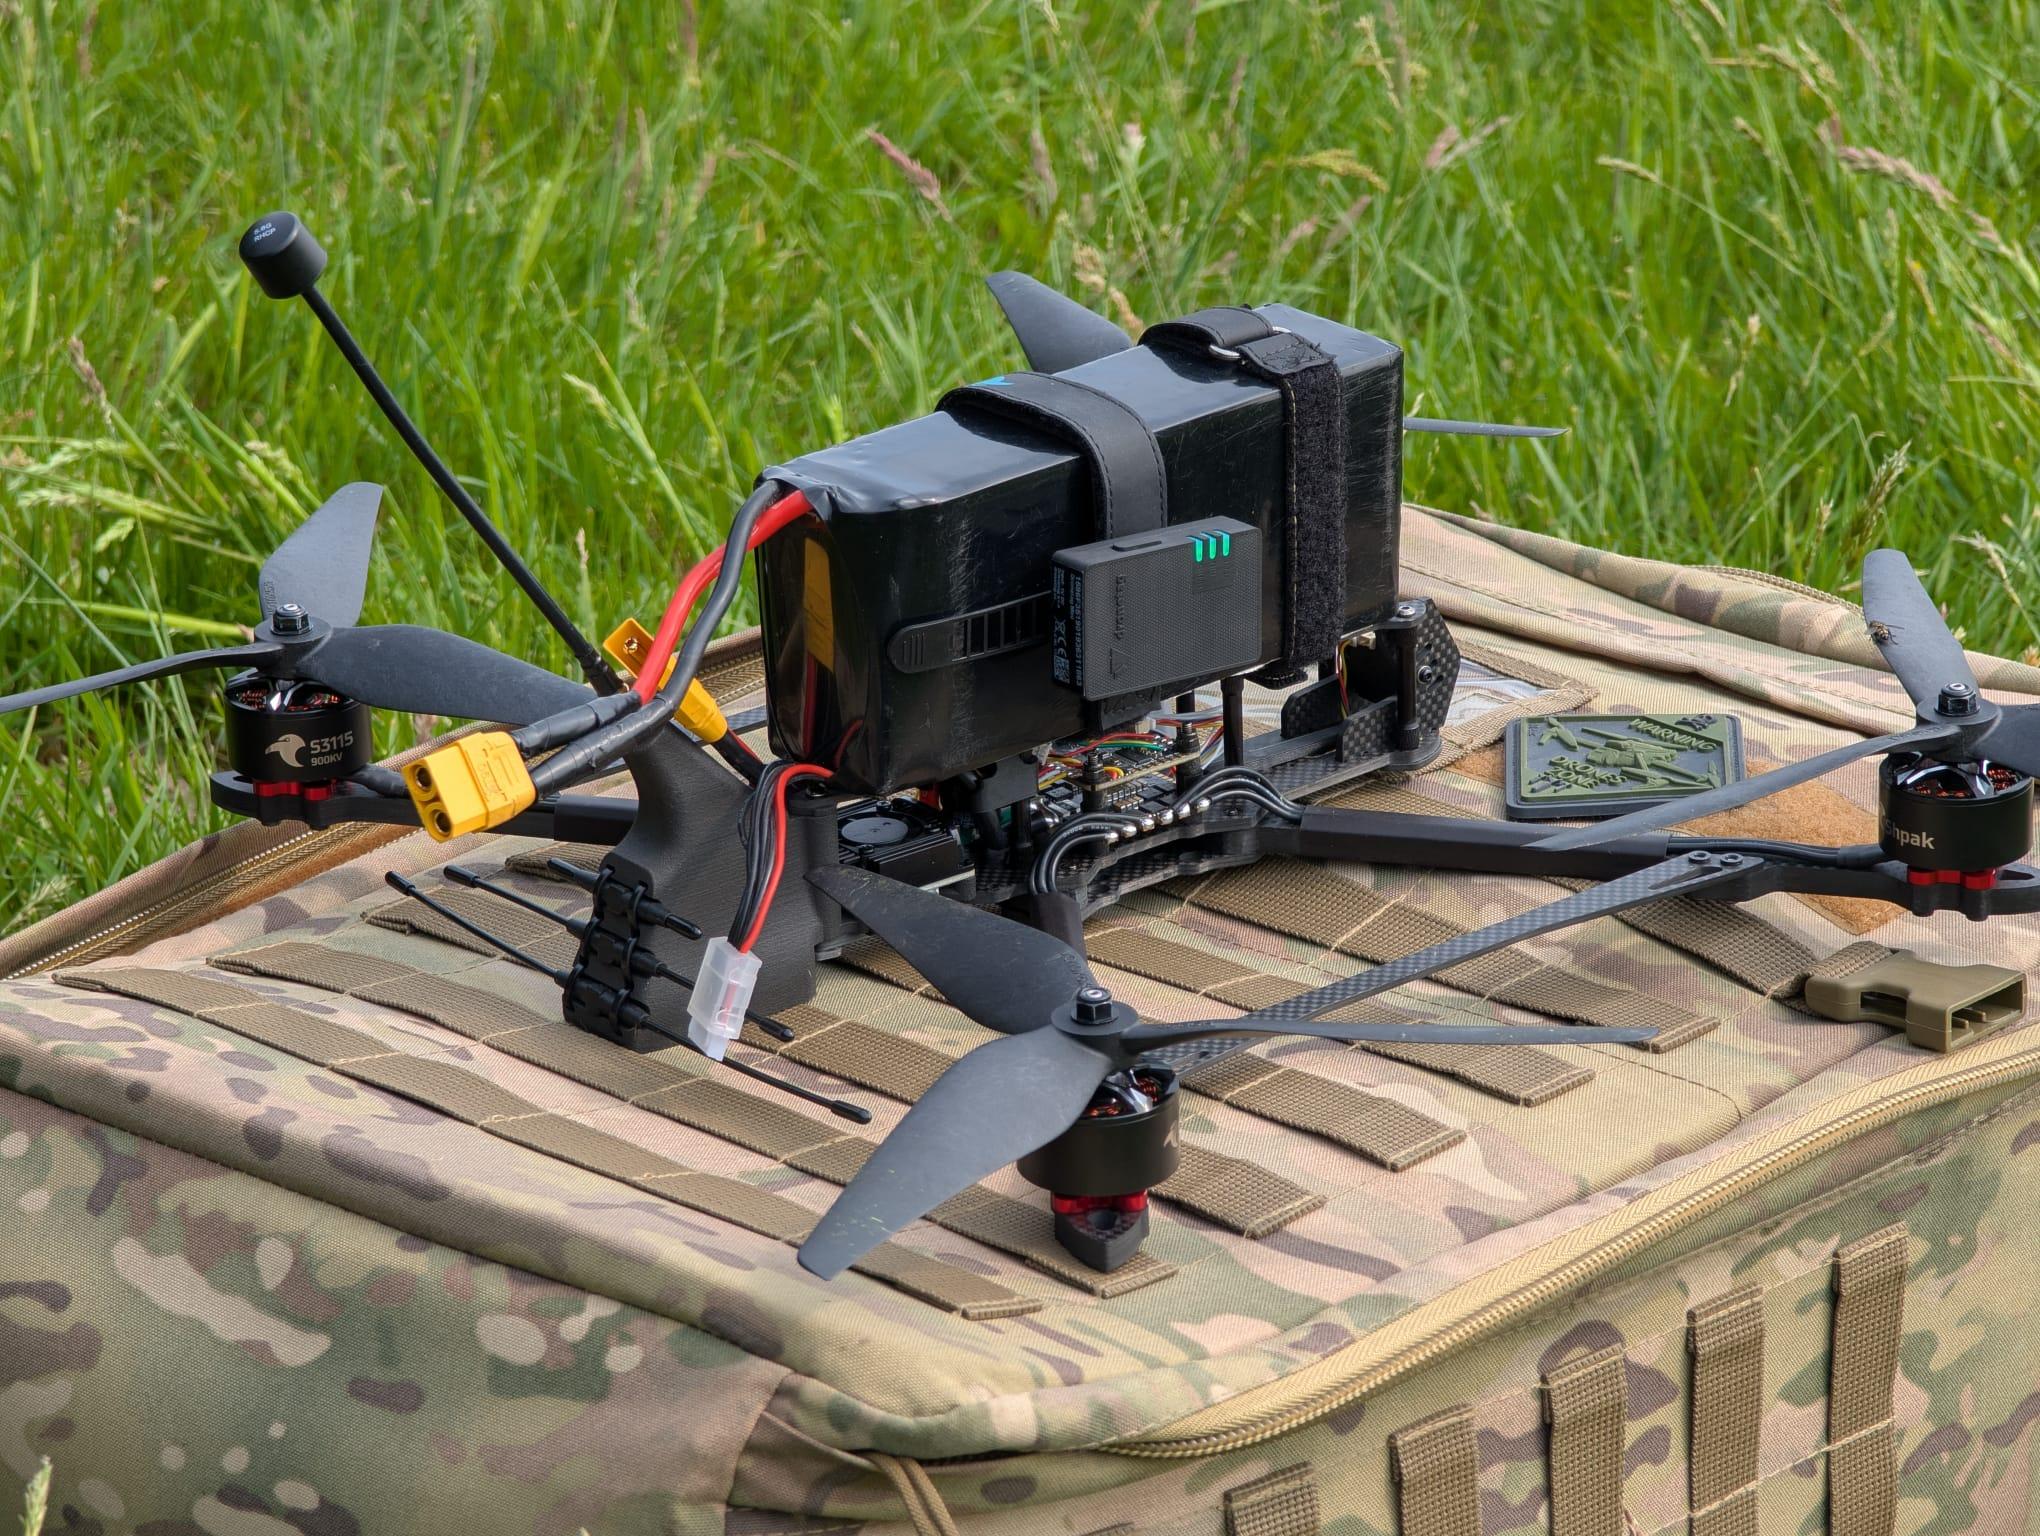
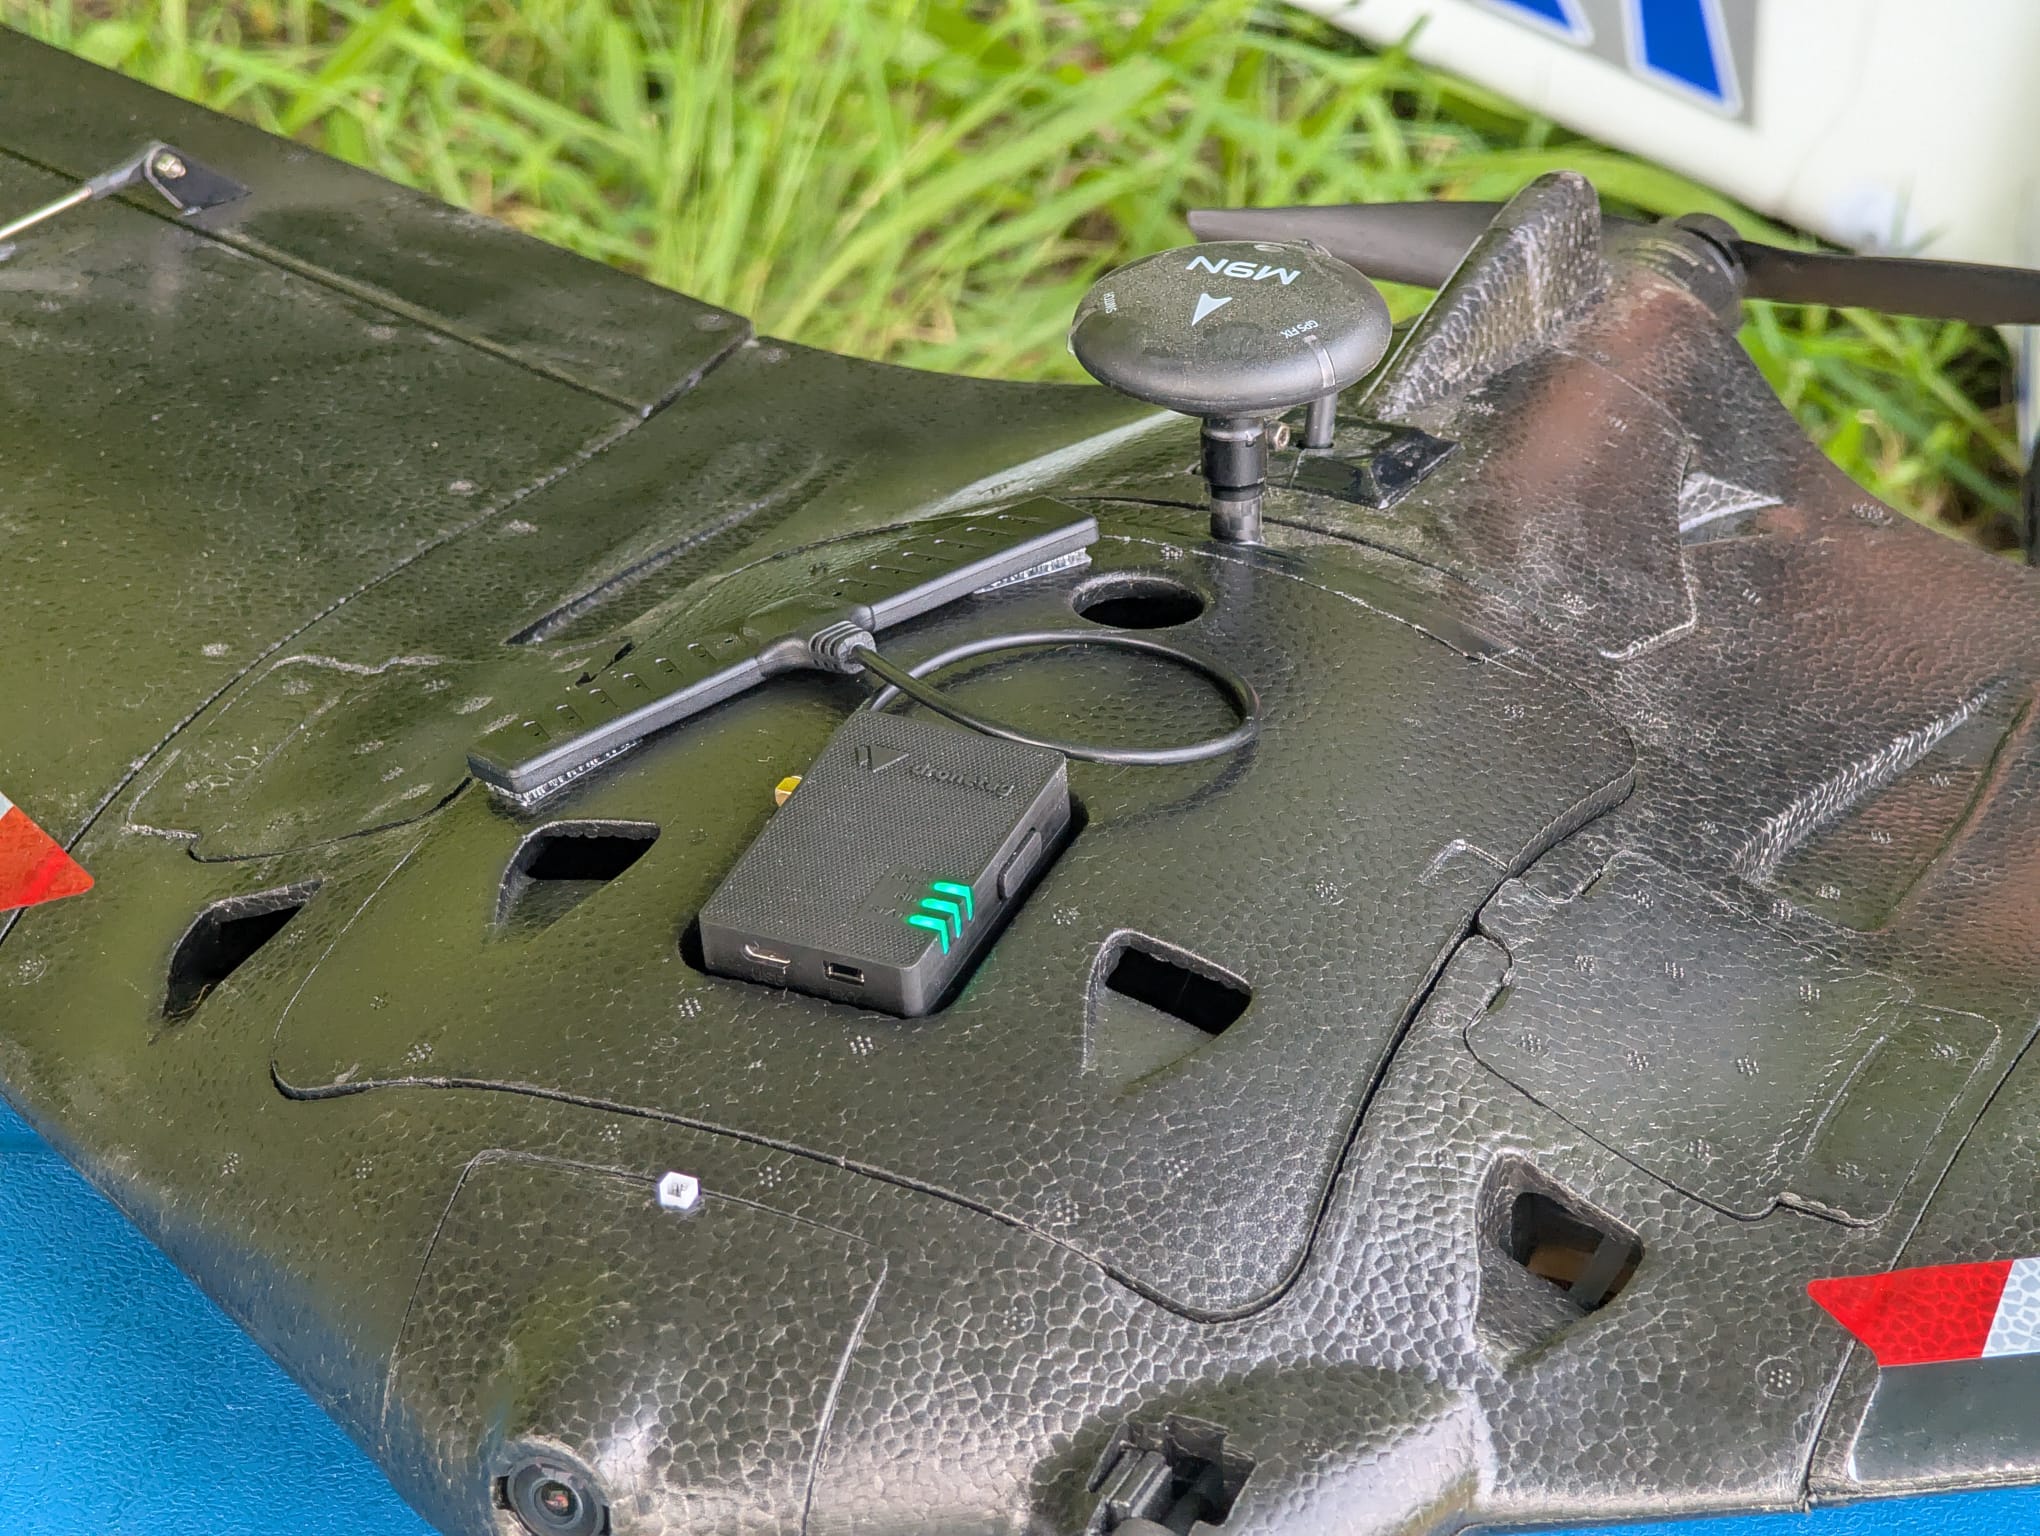
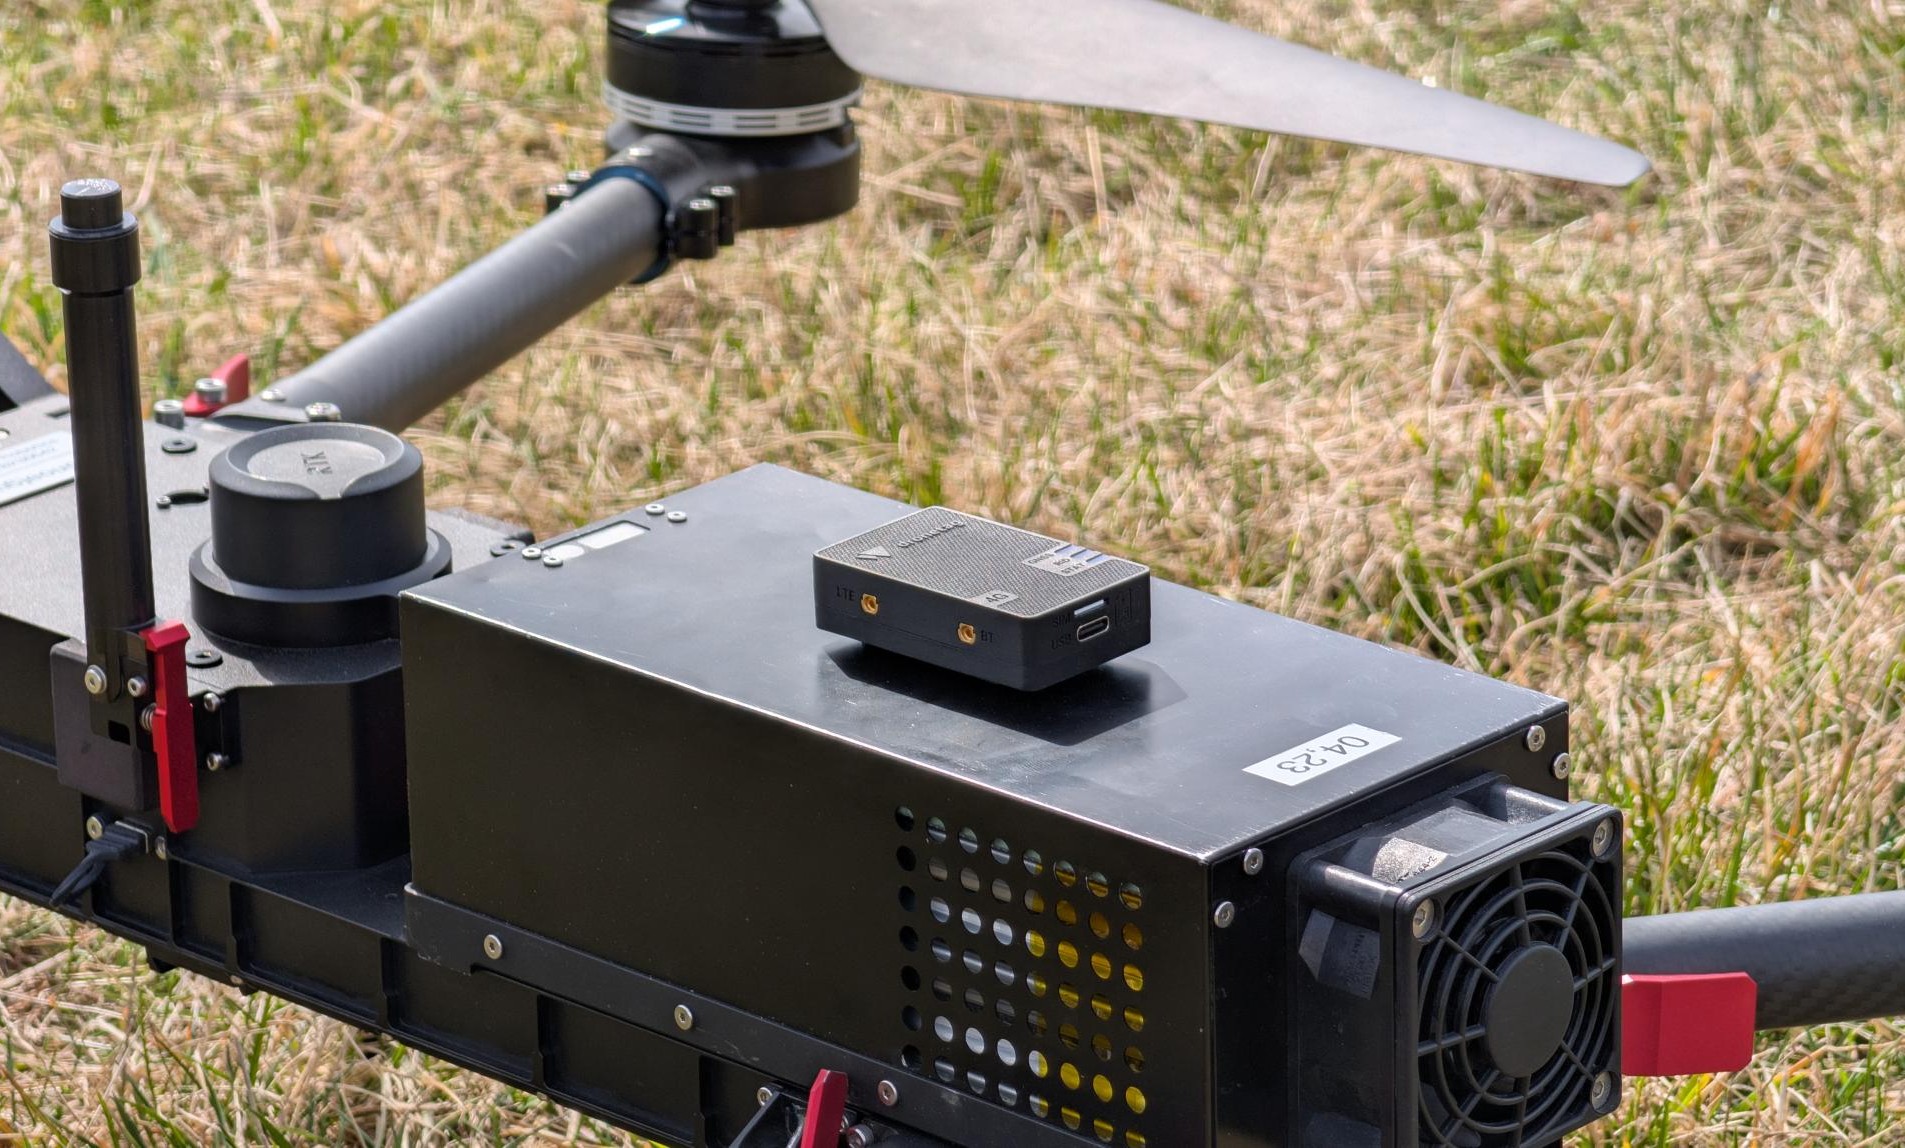
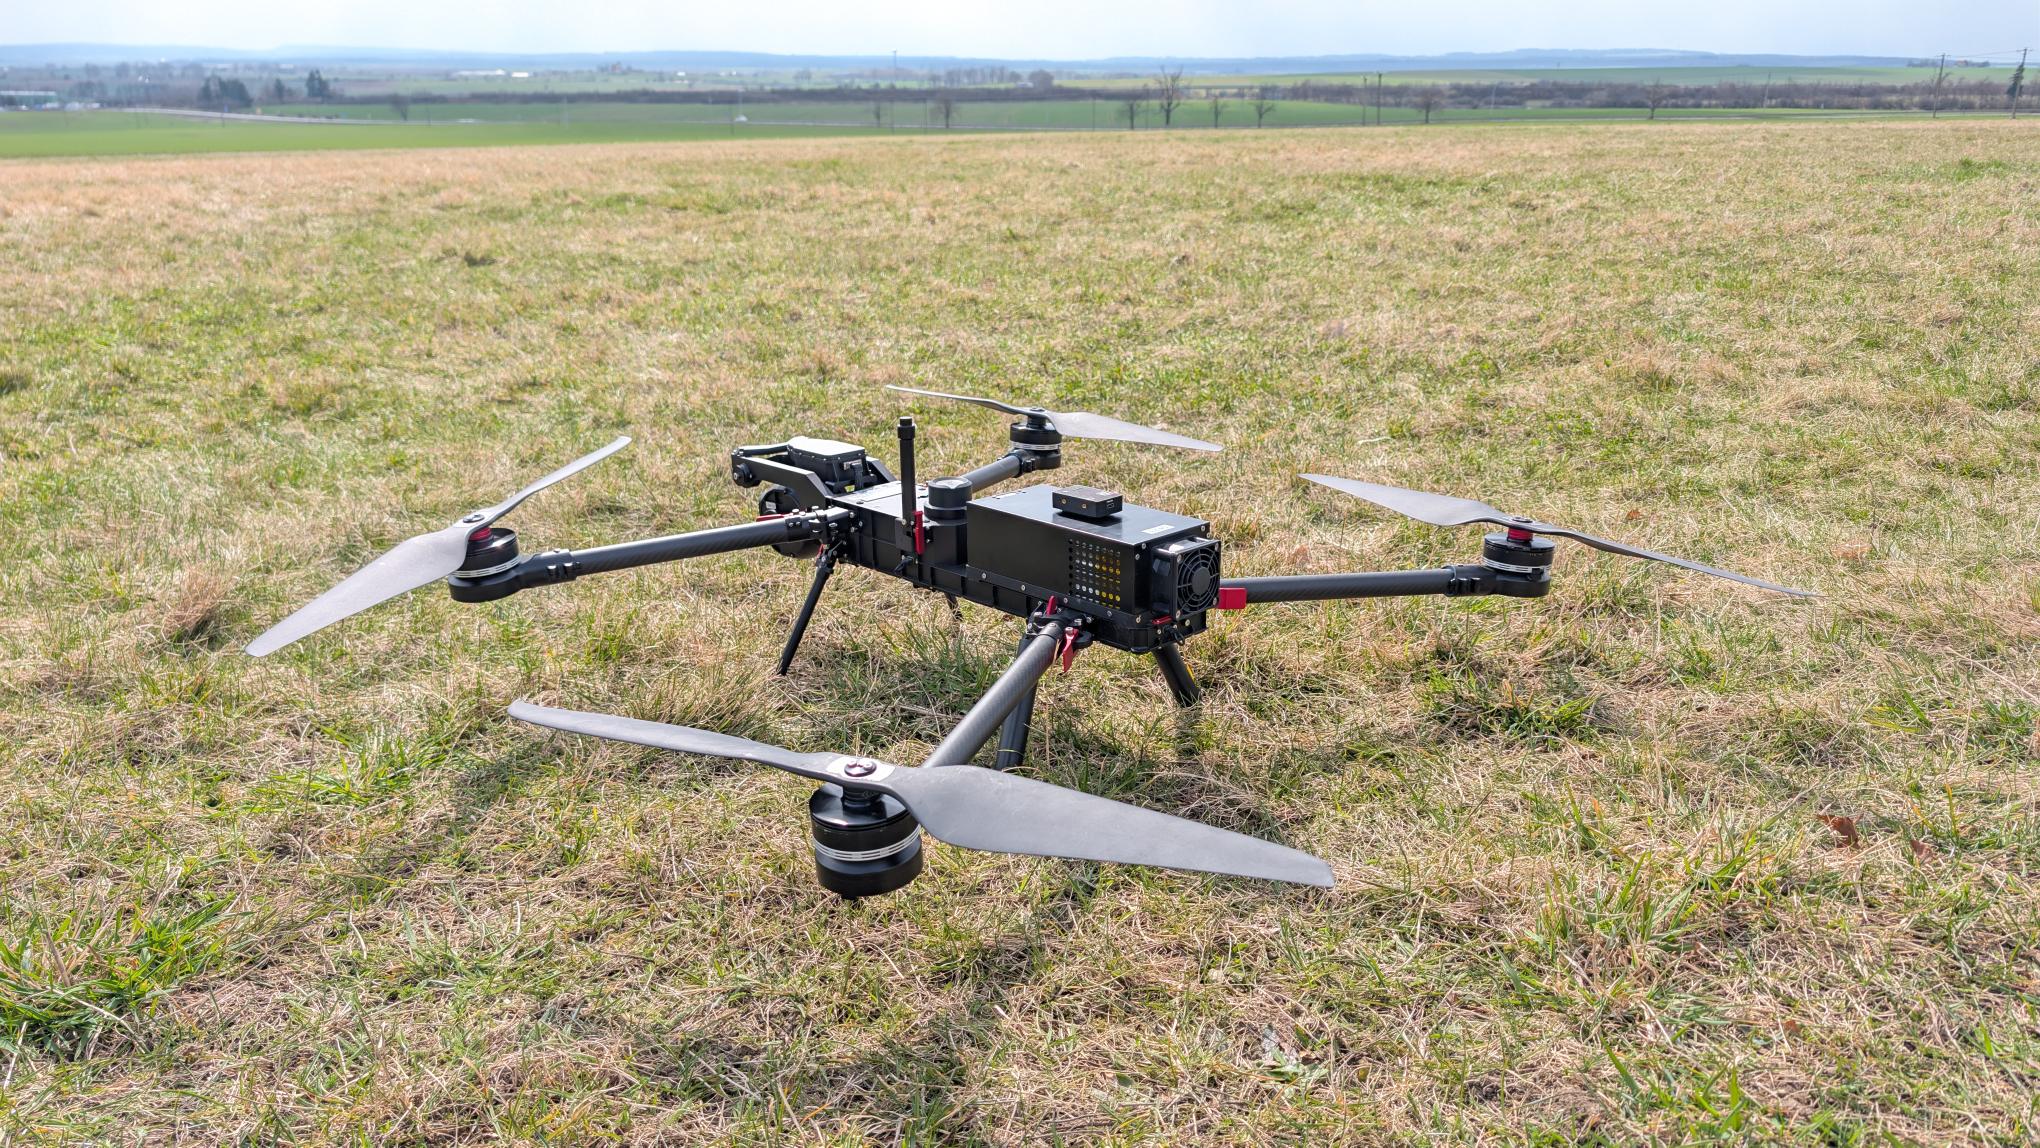
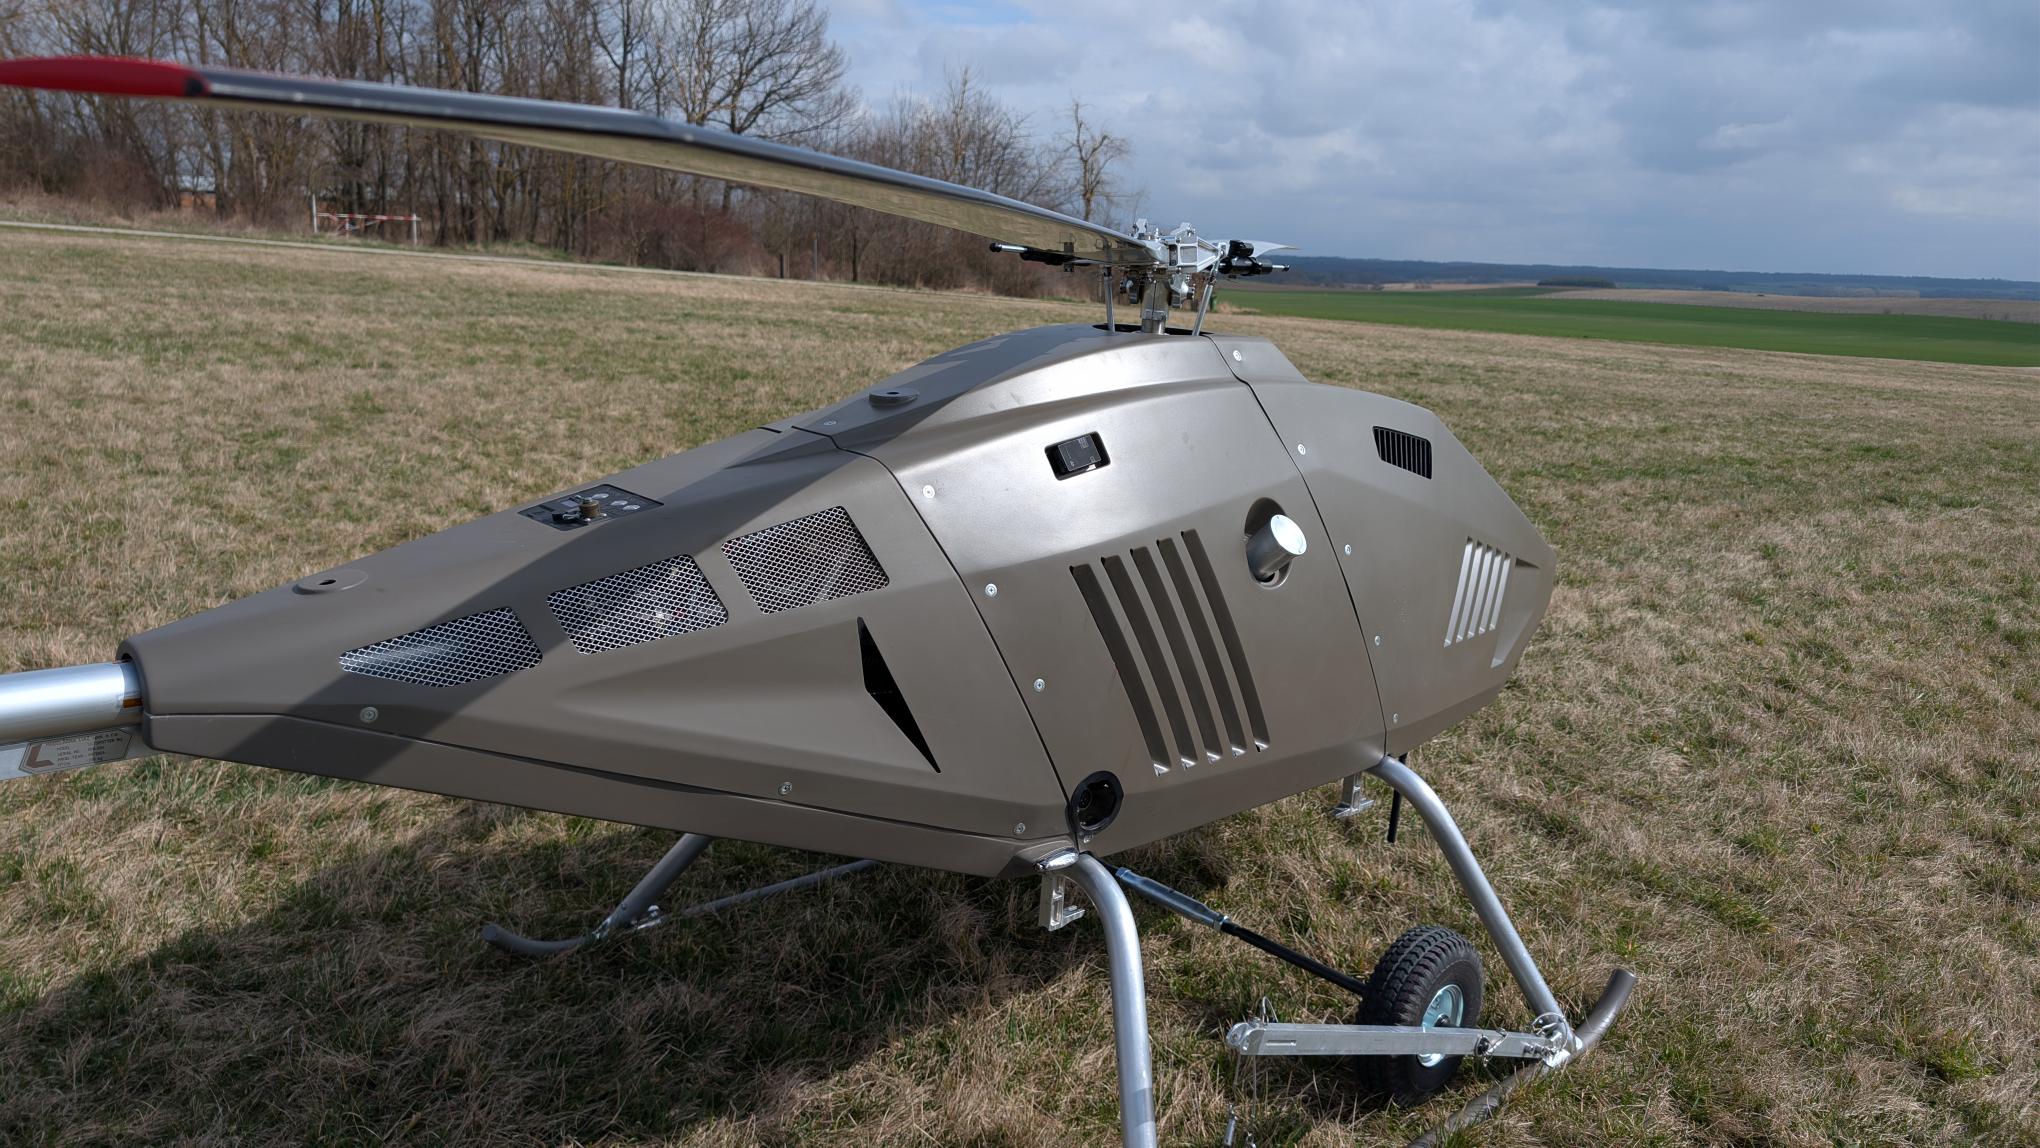
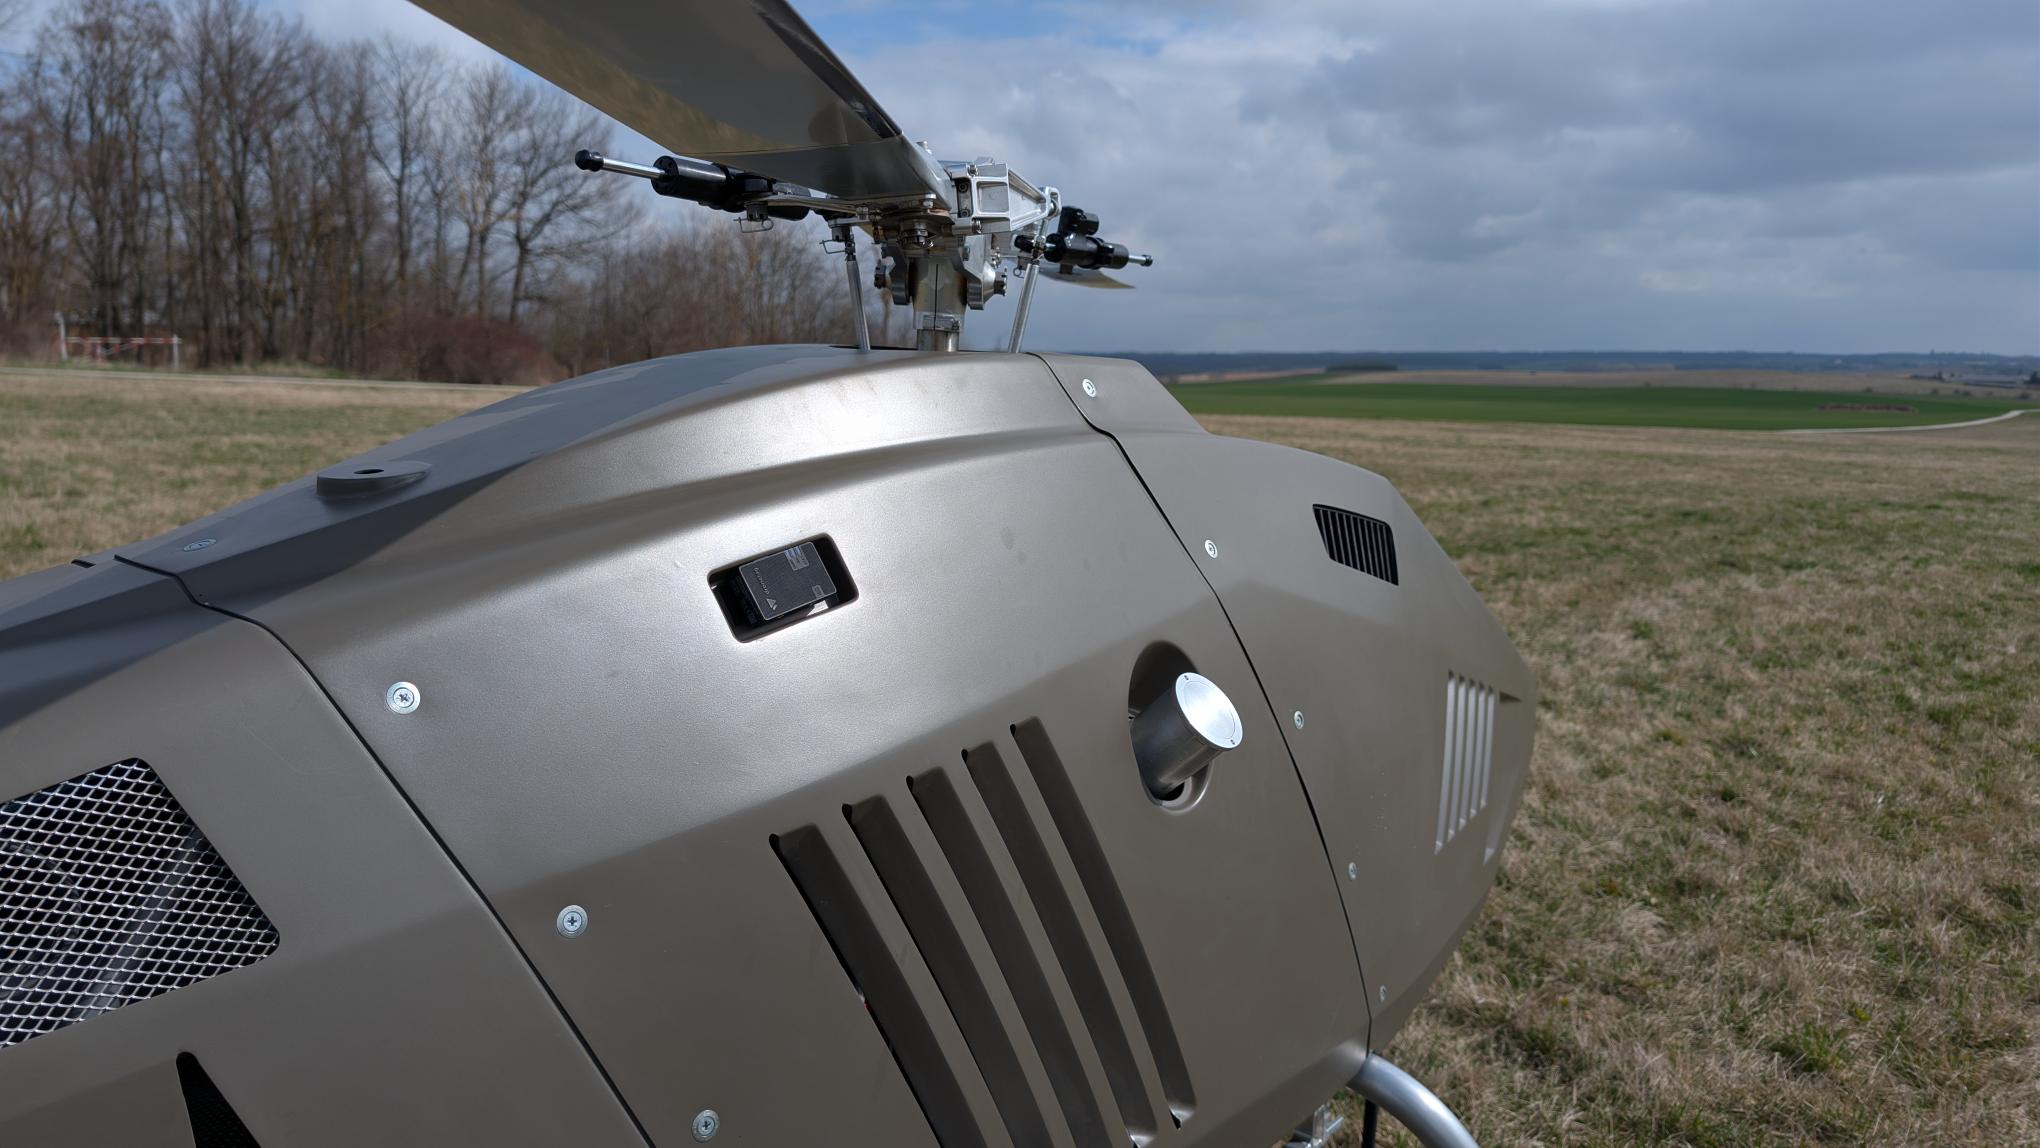
Proper Location
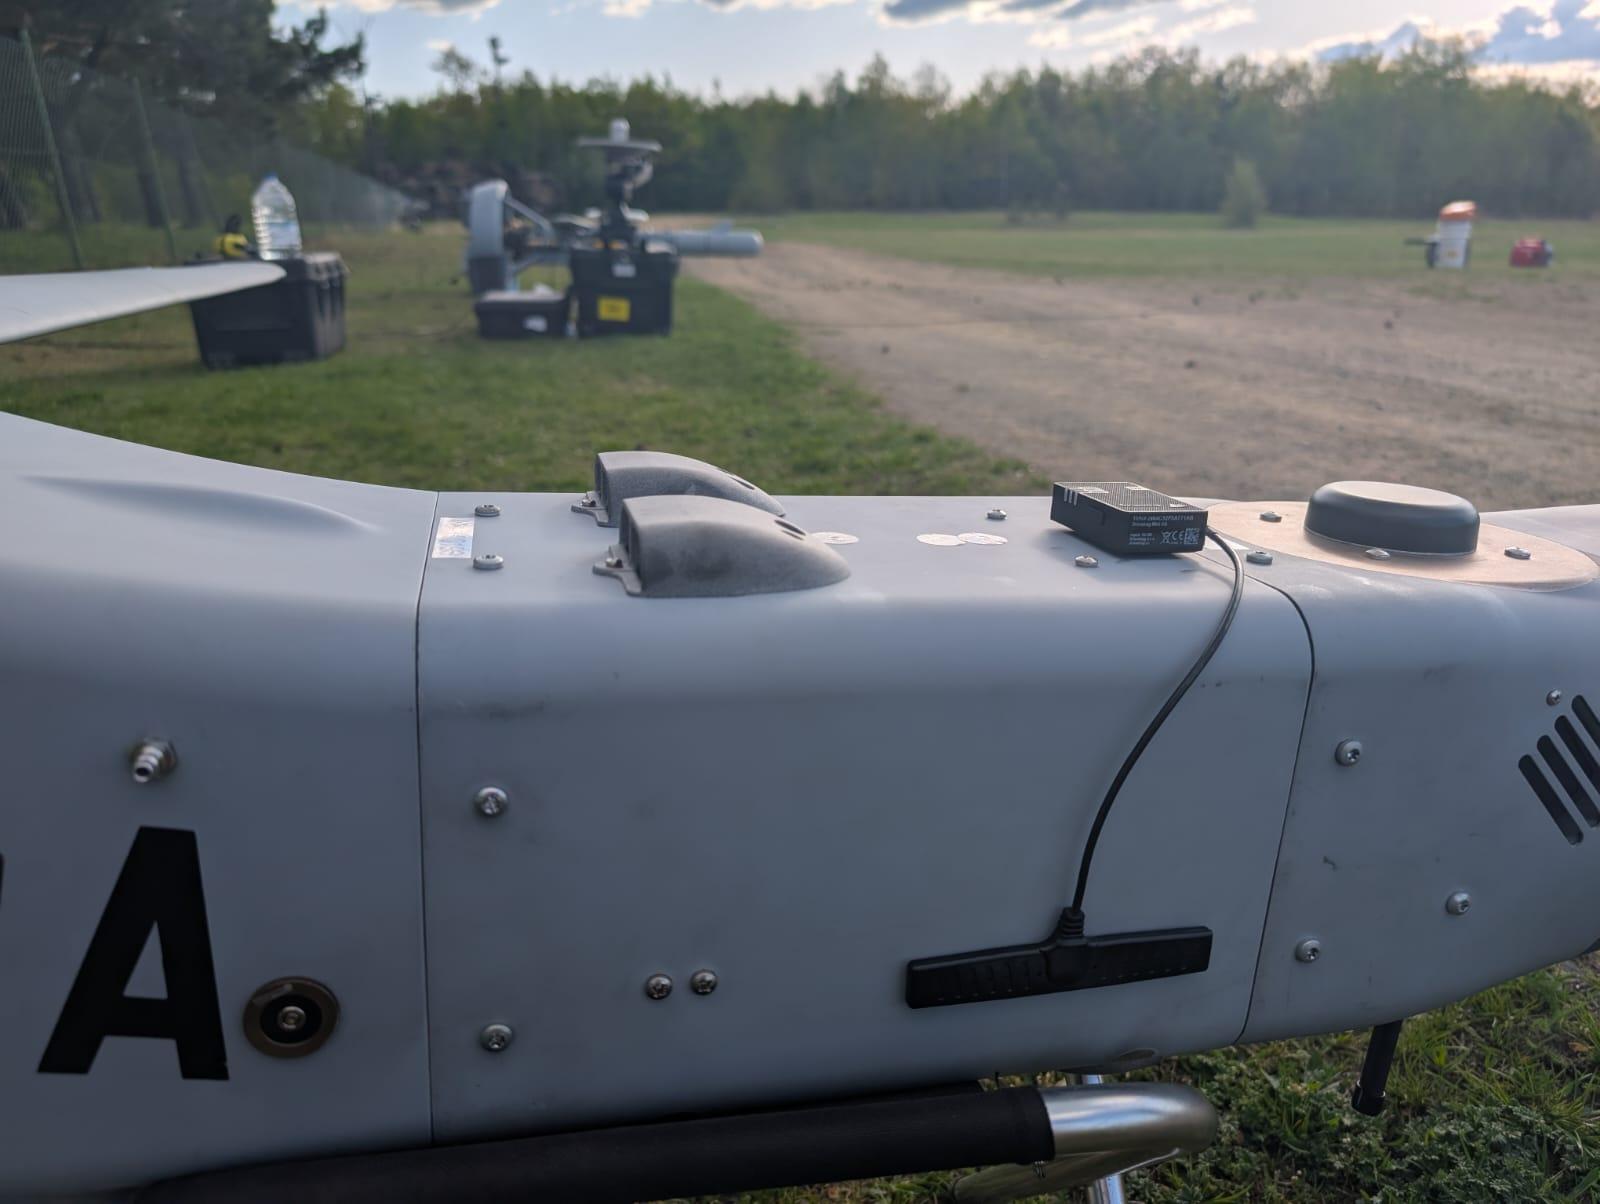
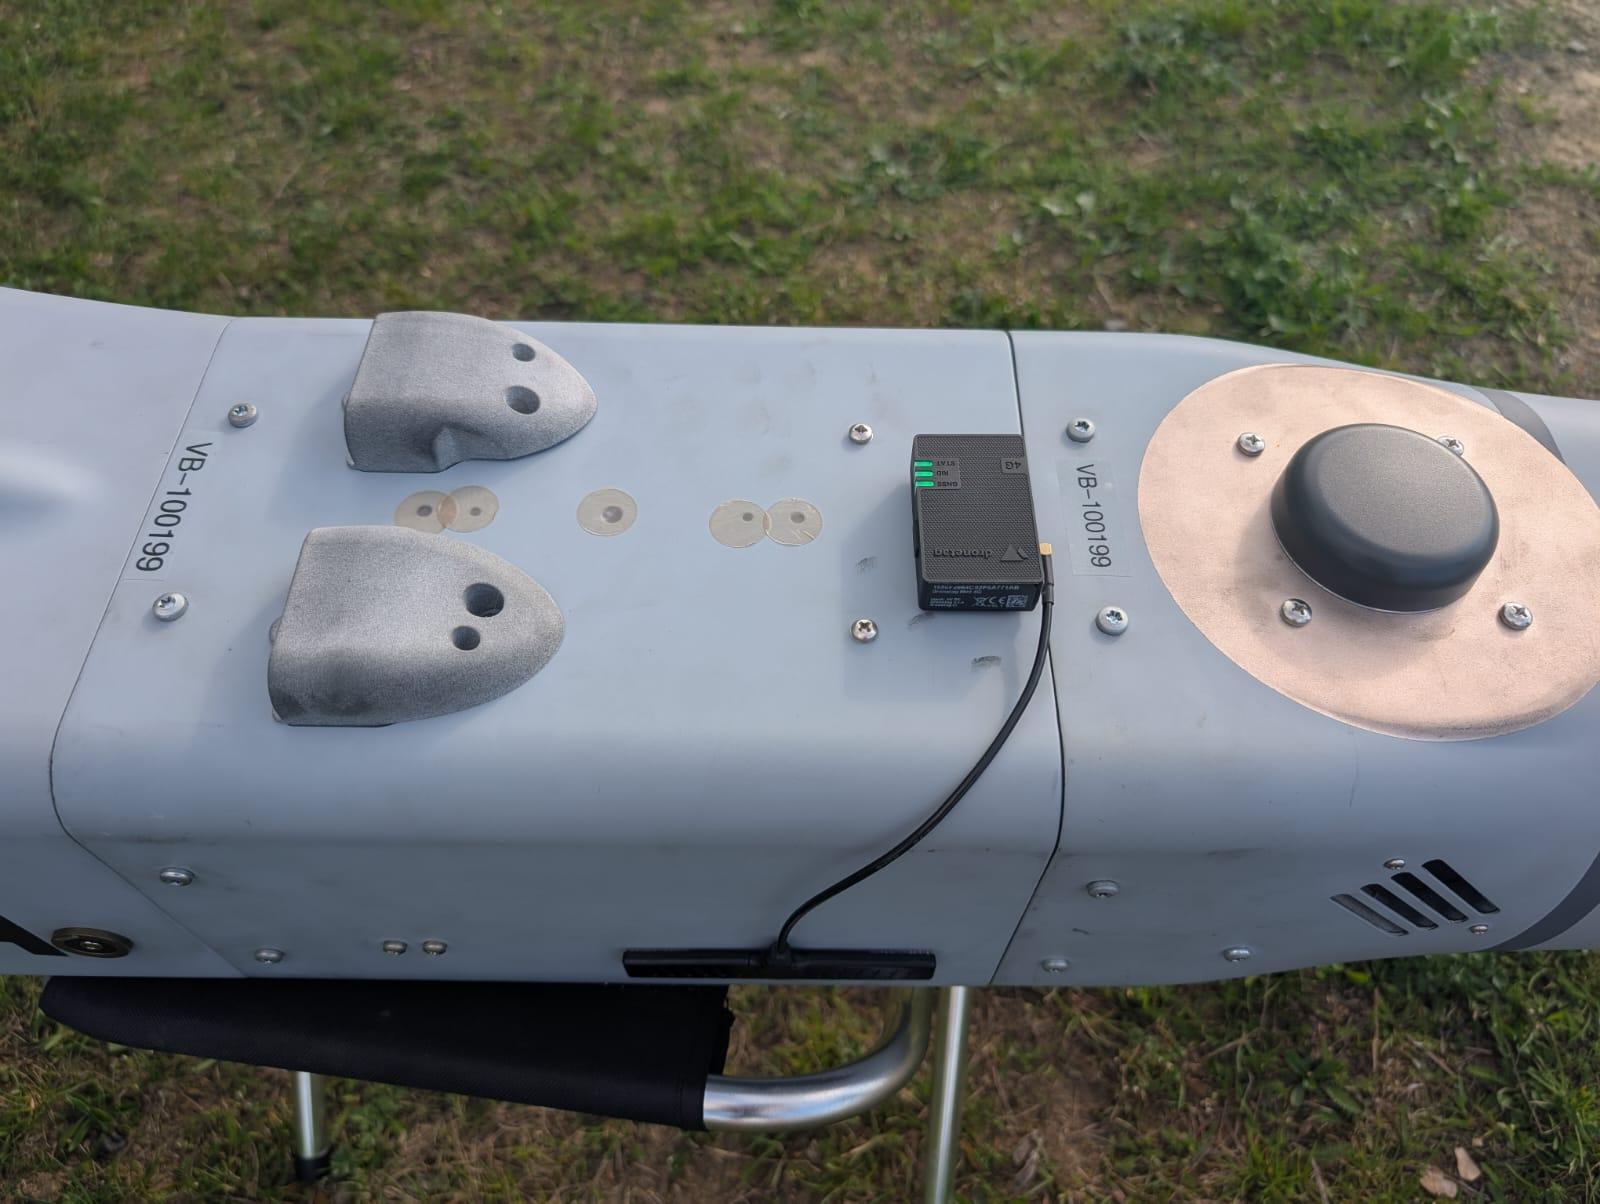
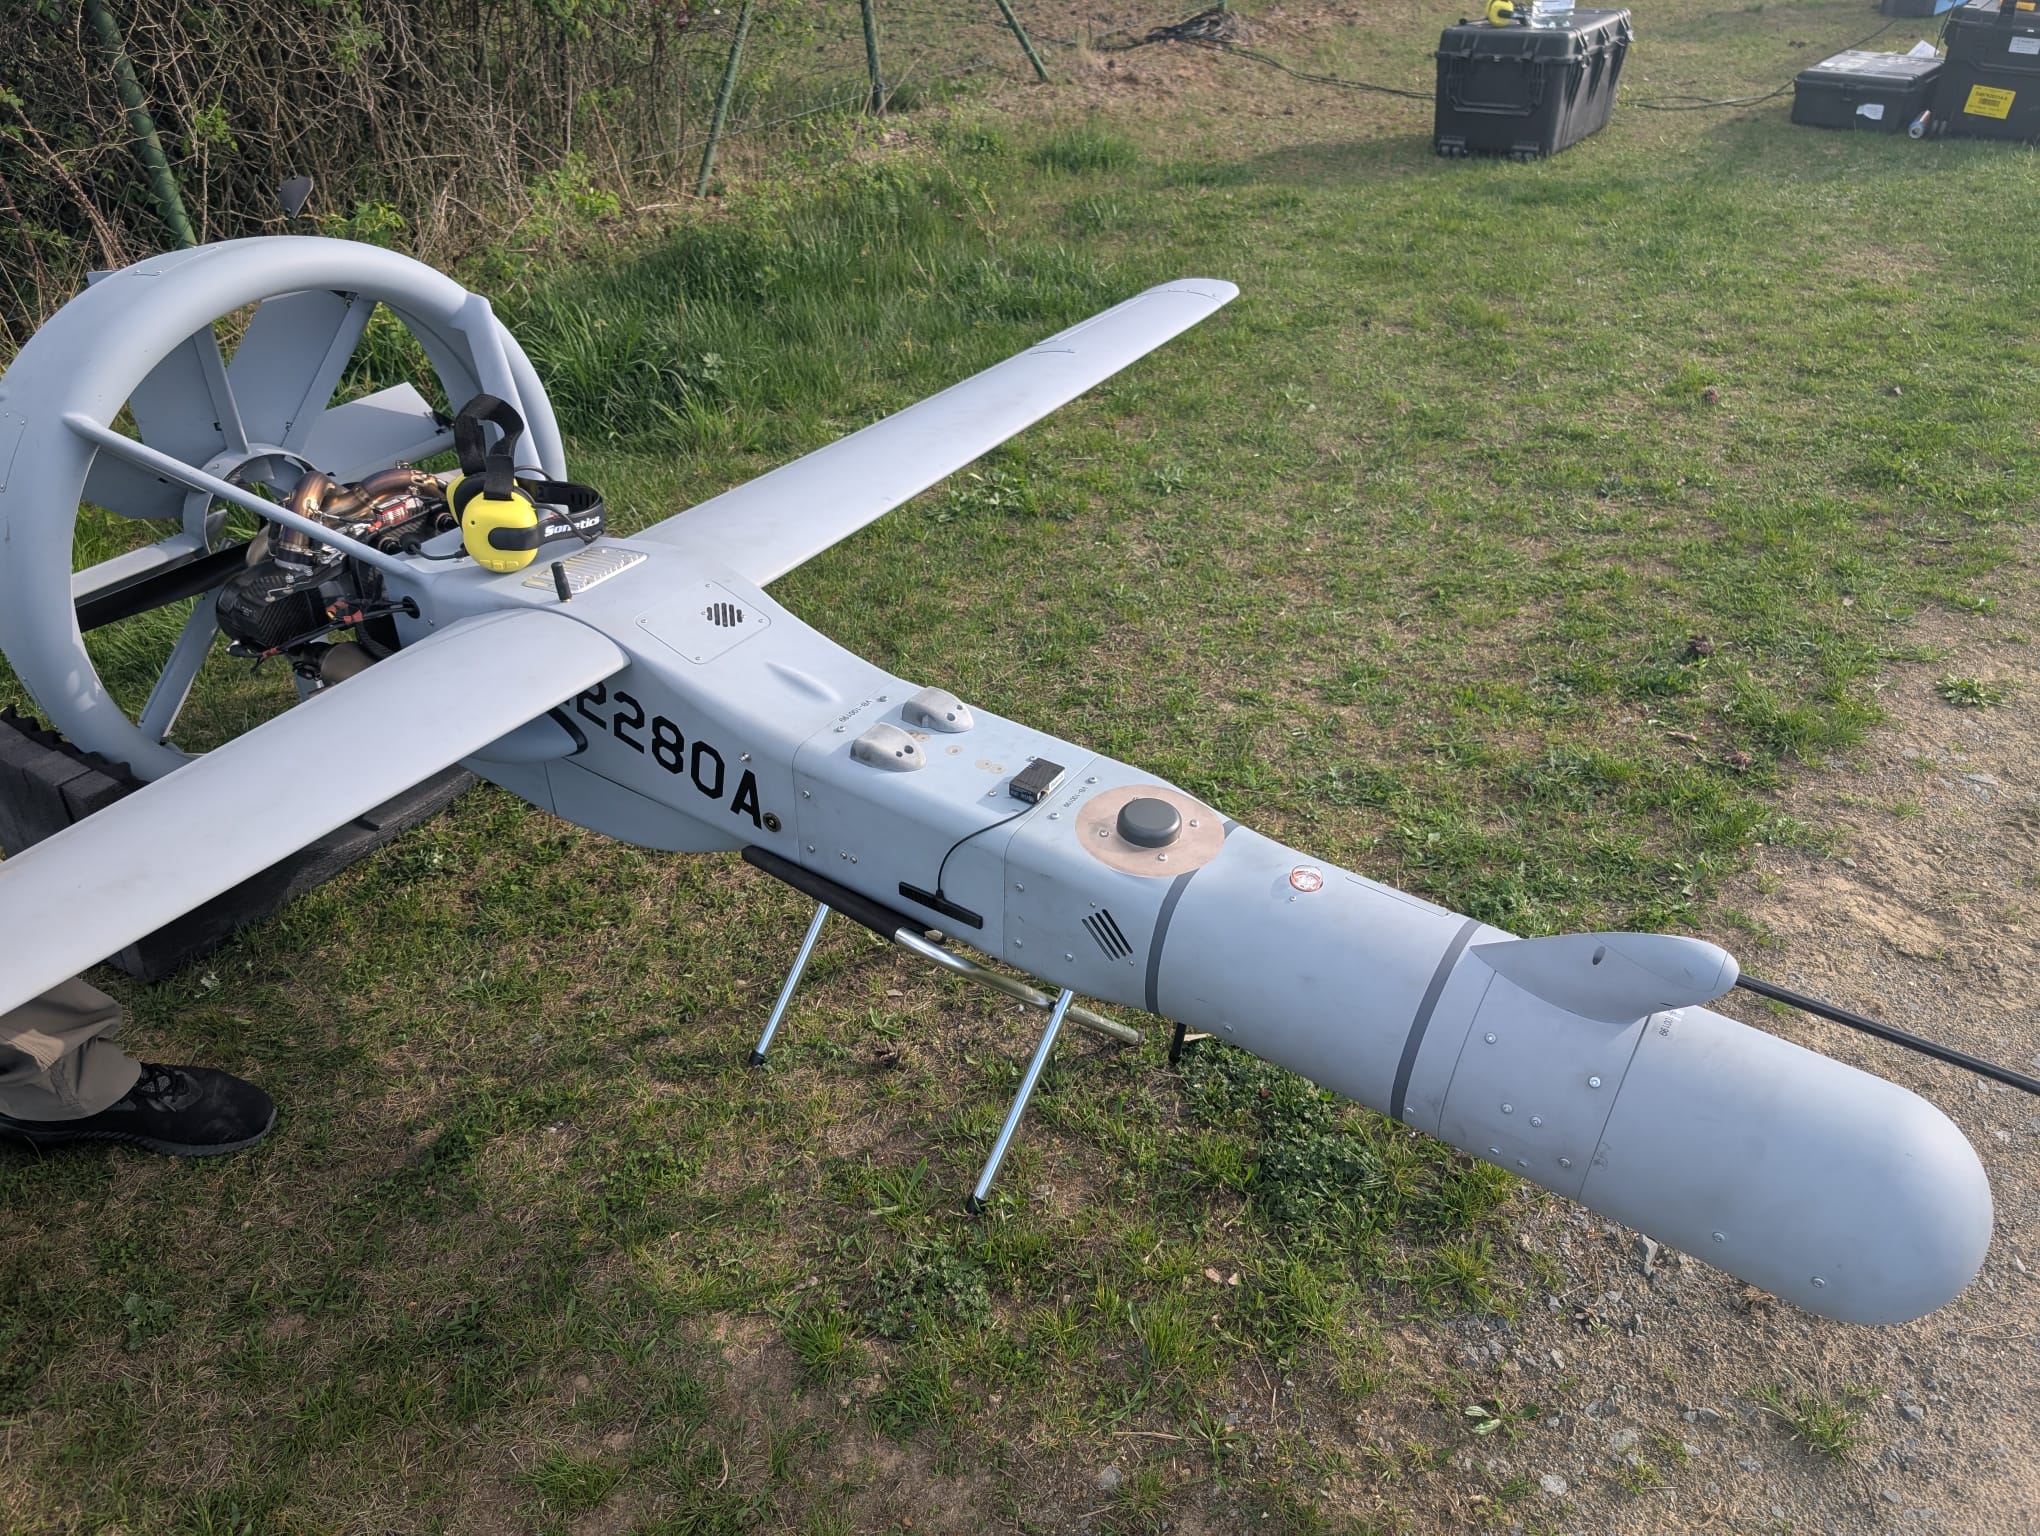
When looking for a suitable location to place the Mini on your drone, you need to watch out for four potential issues.
- Don't place the Mini over a curved surface because it might unsnap during the flight.
- Don't place the Mini on a soft material that can bend during mating (such as plastic covers). The Dual Lock may not hold properly.
- Don't place the Mini over or close to other electrical components such as the flight controller, IMU, GNSS antennas, or RF transceivers.
- Don't place the Mini in inaccessible locations. You should have the button and all the LEDs always reachable and visible.
Remember, if you put your Mini on top of your drone, you can expect a better GNSS signal. When underneath, a better range for Bluetooth DRI + better cellular signal is expected. Therefore, the proper location might also depend on your use case.
Dual Lock Counterpart Installation
One part of the Dual Lock is already firmly glued to the bottom of your Dronetag Mini device. Besides that, we have supplied you with a self-adhesive counterpart, which must be placed on your drone, and a clean alcohol pad to prepare the surface.
- Find the proper surface on the drone for the Dual Lock counterpart.
- Clean the surface with an alcohol cleaning pad.
- Wait three minutes to let the alcohol evaporate.
- Remove the foil from the mating piece and stick it onto the area.
- Wait five minutes, so the glue hardens.
- Snap the device into the mating piece on the drone.
- Ensure the glue on both parts holds firmly by repeatedly removing the device from the drone.
Mating the Mini with the Drone Counterpart
Mating the Mini with an aircraft counterpart is fast and easy. Just ensure that the Mini is centred on the counterpart and push it towards the drone until you feel the mushroom-shaped heads interlock. This is also accompanied by an audible "snap". Before each mating, ensure that both Dual Locks are clean and the mushroom-shaped heads are not bent. When you want to remove the Dronetag Mini from your drone, pull the device free from one of its corners.
Where to Get a Replacement?
If you need more counterpart pieces, you can order Dual Lock parts on our e-shop. Alternatively, use your local 3M distributor to order a replacement. If you use an alternative distributor, you must ensure that the Dual Lock counterpart is type 3M SJ4570 sized 36x22 mm (1.4x0.9 in).
Disclaimer
We kindly advise that our company cannot assume responsibility for the installation of our product by the user or any potential loss incurred as a result. While we strive to provide comprehensive guidance and support, the responsibility for proper installation lies with the user. Should you require any further assistance or clarification, please do not hesitate to contact our customer support team. Your understanding is greatly appreciated.
MMCX Antenna Installation Guide
The MMCX (Micro-Miniature Coaxial) antenna is designed for reliable connections in wireless communication modules and is widely used for its compact size. Follow this guide to ensure proper installation, handling, and safe disconnection to avoid damaging the connector on your Dronetag device.
Step-by-Step Installation
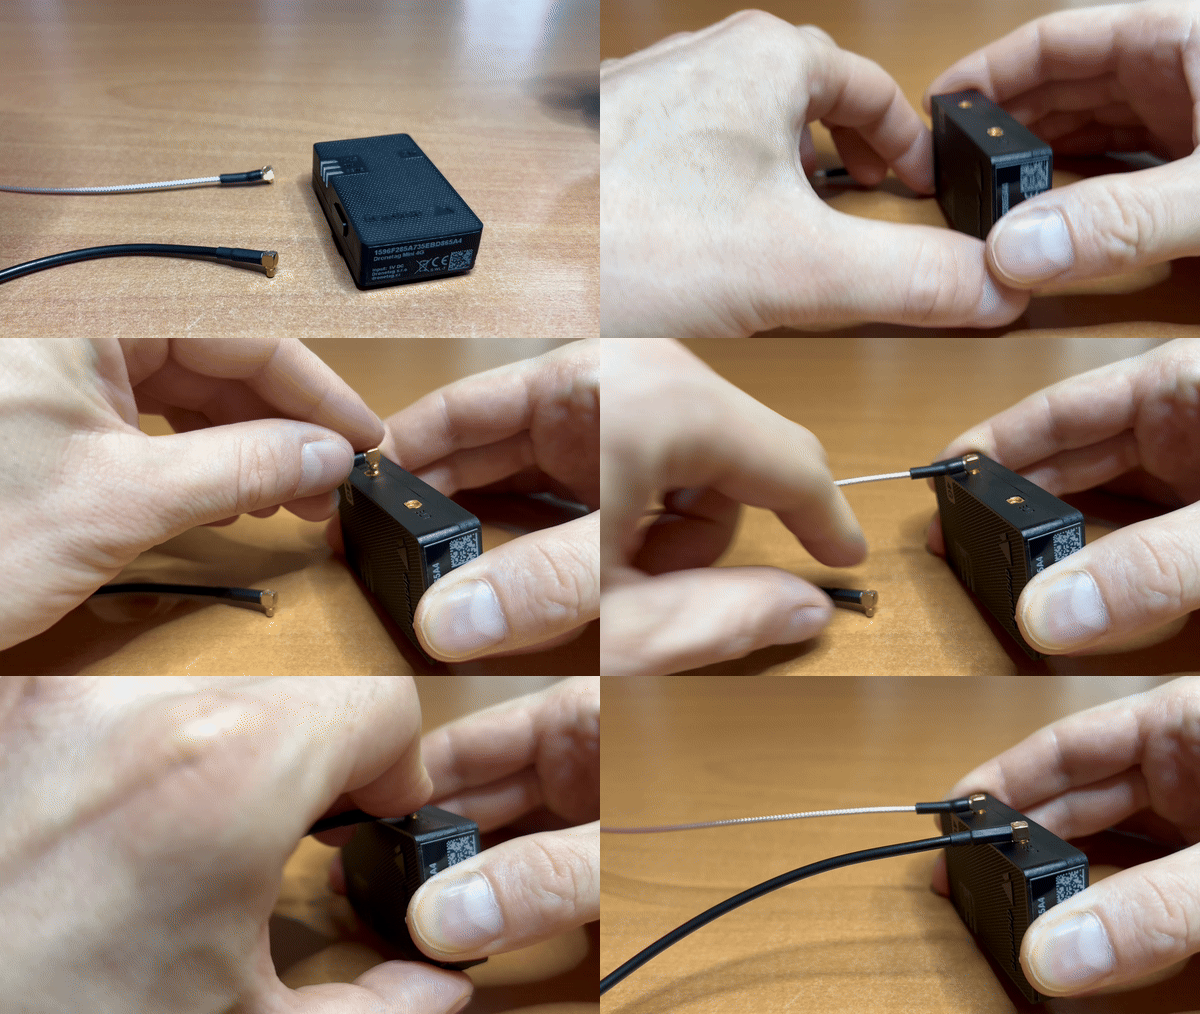
How to safely connect MMCX Connector
1. Prepare Your Workspace
- Work in a static-free environment to avoid potential damage to the device.
- Ensure all components, including the antenna and the Dronetag device, are clean and free of debris.
2. Locate the MMCX Port
- Identify the MMCX port on the Dronetag device. It is a small, round connector located near the edge of the circuit board.
3. Align the MMCX Antenna
- Carefully position the MMCX antenna connector over the MMCX port.
- Align the connector straight above the port to avoid damaging the pins inside.
4. Secure the Connection
- Gently press the MMCX antenna into the port until you hear or feel a "click," signaling a secure connection.
Do not apply excessive force when attaching the antenna, as it may damage the port or connector.
5. Route the Antenna
- Position the antenna cable to ensure it doesn’t interfere with other components.
- Use tape or cable ties to secure the antenna in place, if necessary, to prevent it from moving during operation.
6. Test the Antenna
- Power on the Dronetag device and check the signal strength or run a connectivity test to confirm the antenna is functioning properly.
Safe Disconnection Process
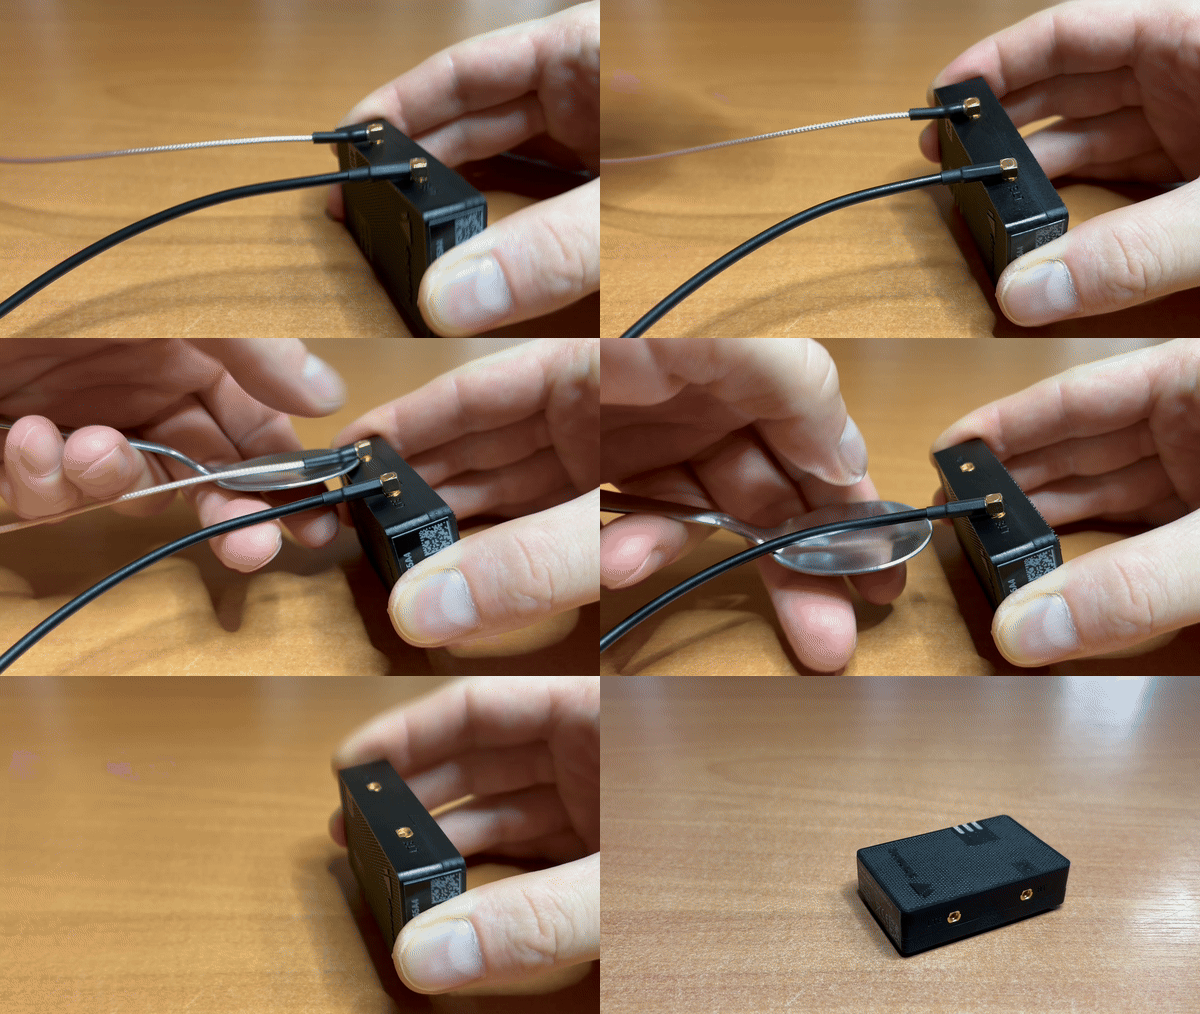
How to safely disconnect MMCX Connector
The MMCX connector is designed for a limited number of connect and disconnect cycles. To extend the lifespan of the connector and prevent damage:
1. Use a Suitable Tool
- Instead of pulling the antenna directly, use a small tool like the edge of a spoon to carefully lift the antenna connector from underneath.
- Gently lever the connector upwards while supporting the antenna base. This prevents applying excessive force to the connector and port.
2. Avoid Direct Pulling
Pulling the antenna out by the cable can stress the connector and cause it to break. Always disconnect using the recommended method.
Improper handling or forceful removal of the MMCX connector that results in damage will void the warranty or eligibility for repair. Always follow the guidelines provided to ensure the proper handling of your Dronetag device.