
Subscriptions
- Document
- Dronetag App — Subscriptions
- Chapters
- 7
- Source
- help.dronetag.cz/print/dronetag-app/subscriptions
Subscriptions
Find out more about Subscription plans for transmitters and Connect Plans for RIDER and how to manage them.
Whether you’re broadcasting Remote ID or monitoring Remote ID signals in the airspace, Dronetag subscriptions keep your devices connected to cloud (Mini, Mini 4G) and powerful.
Learn about Subscriptions for transmitters and RIDER Connect Plans for RIDER - what they do, how they work, and how to manage them directly in the Dronetag App.
Checking Connectivity Plan Status
You can check your current Connectivity Plan status anytime in the Dronetag App (mobile or web):
Option 1 – From Home Screen
On the home screen with the map, tap your RIDER profile card to open the device detail screen.
You’ll see the current state of your Connectivity Plan usage.
Option 2 – From Profile
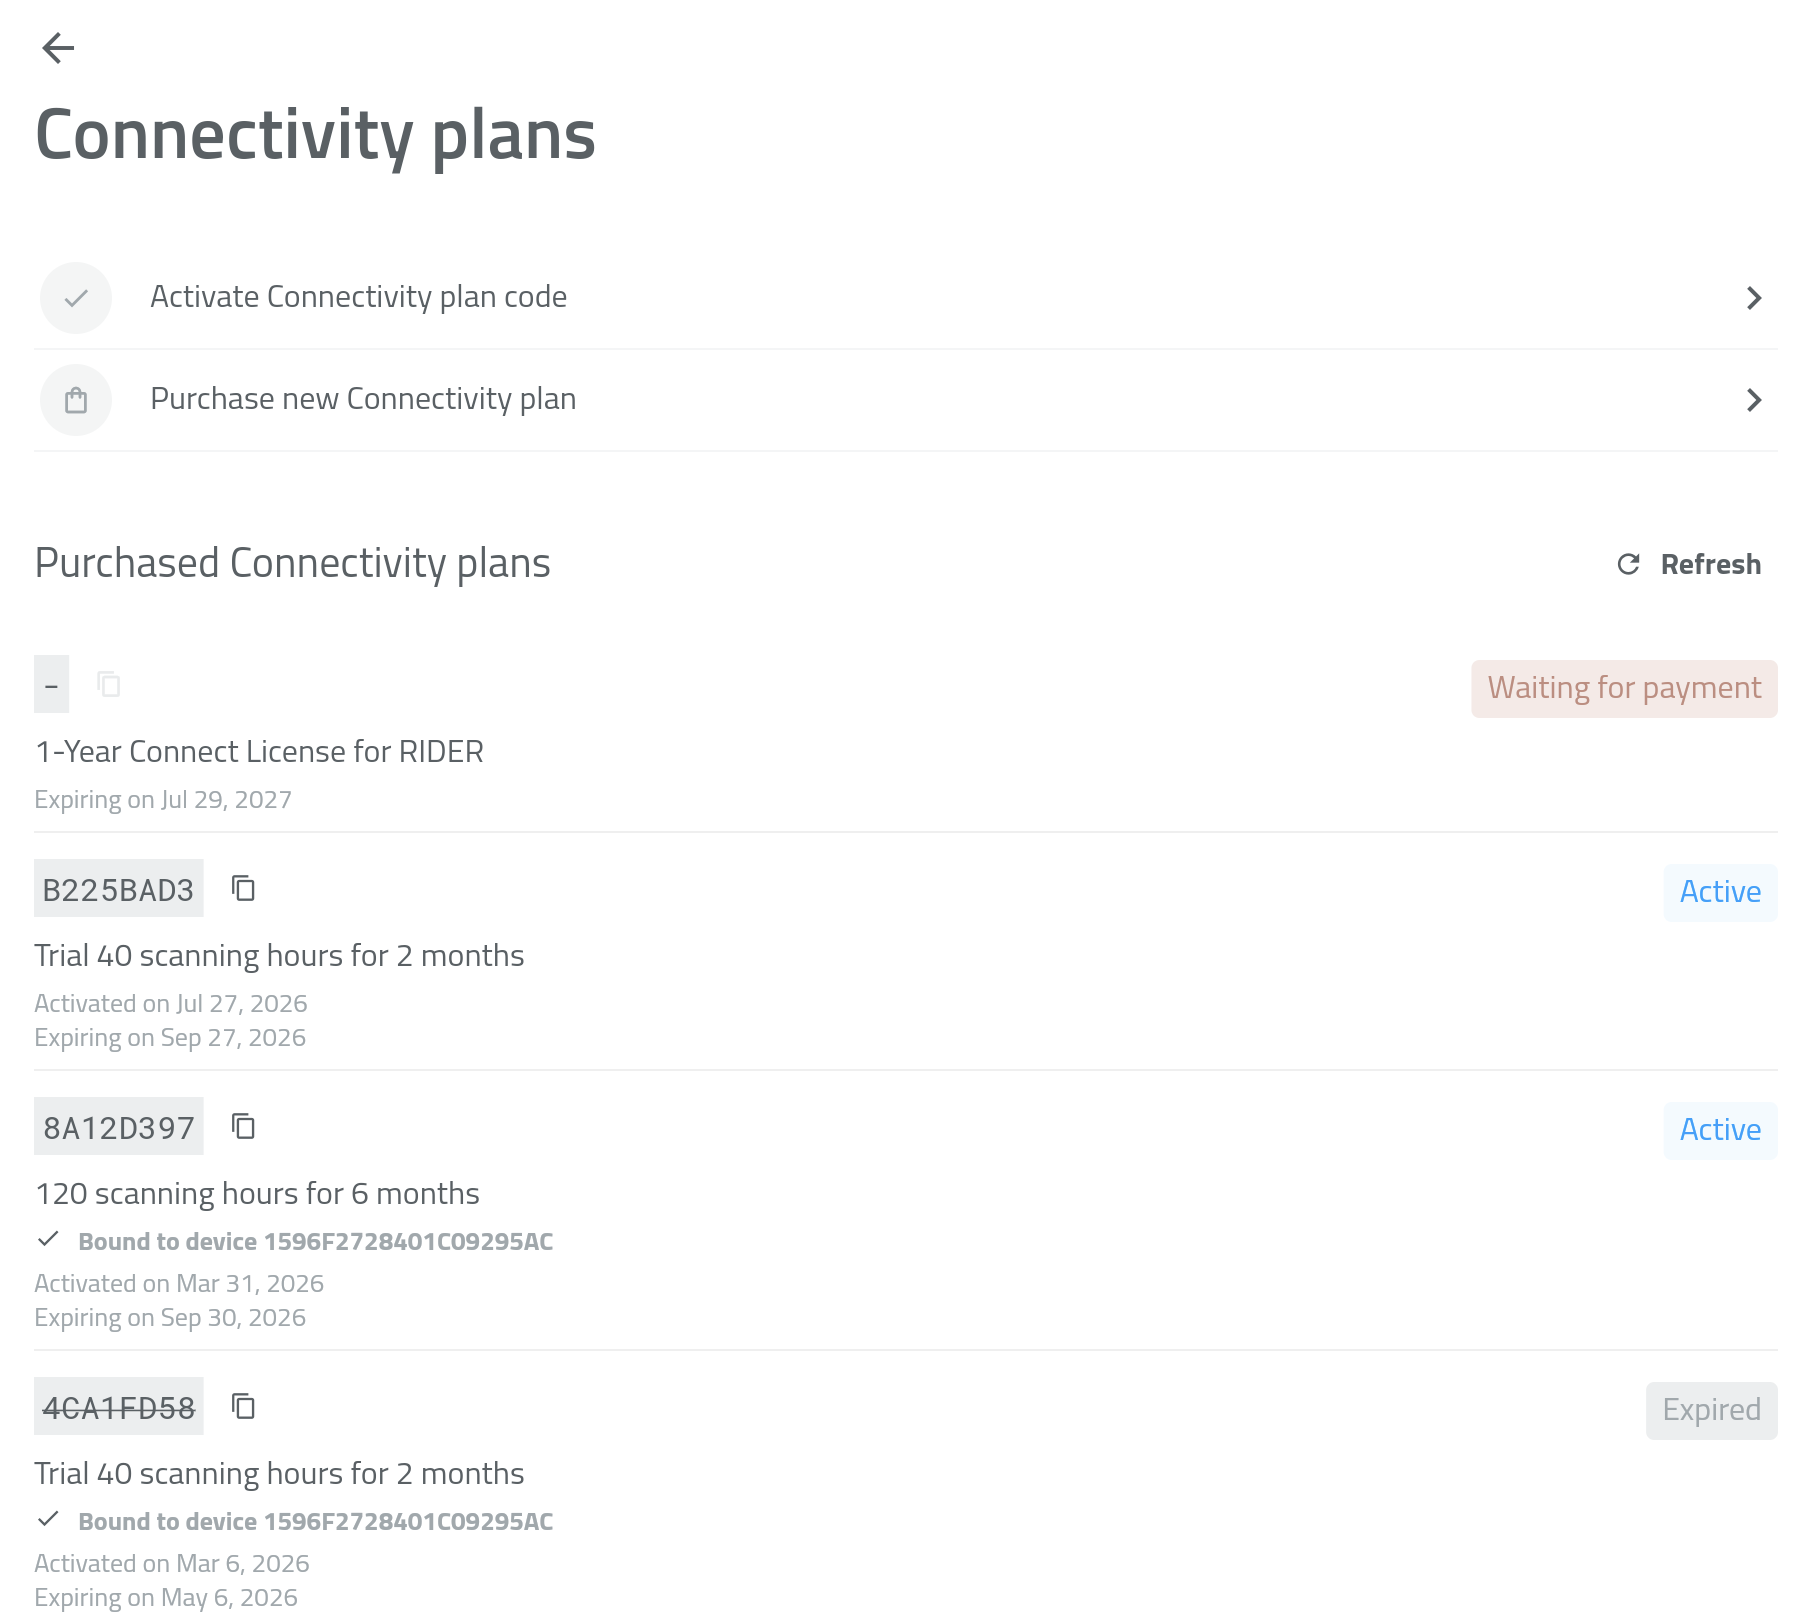
Open Profile → Account Details, where you’ll find a list of all your active, expired, or pending bundles.
What Happens When Connectivity Plan Expires
Once your Connectivity Plan runs out or expires:
- Cloud data storage is paused
- RIDER switches to Offline Mode
You can still scan drones via Bluetooth with the Drone Scanner (Gen. 2) app. Just don't forget to turn the LTE feature off in your RIDER's Configuration page in the Dronetag app.
To continue detecting in Online Mode, activate a new Connectivity Plan.
Learn how in the Purchasing a Connectivity Plan chapter.
Questions & Support
If you have any questions about your Connectivity Plan or account, we’re happy to help.
Contact our support team or email us directly at support@dronetag.com.
We’re here to make your Dronetag experience seamless.
Purchasing a Connectivity Plan
A Connectivity Plan lets your RIDER stay connected to the Dronetag Cloud via its built-in LTE SIM.
It enables:
- Real-time data sync
- Detection storage and history
- Remote monitoring
- API and third-party integrations
You can purchase and activate a Connectivity Plan directly in the Dronetag App (mobile or web).
A Dronetag account is required for activation.
Before purchasing, make sure you’ve used your 2-month free trial that comes with every new RIDER.
How to Purchase a Connectivity Plan
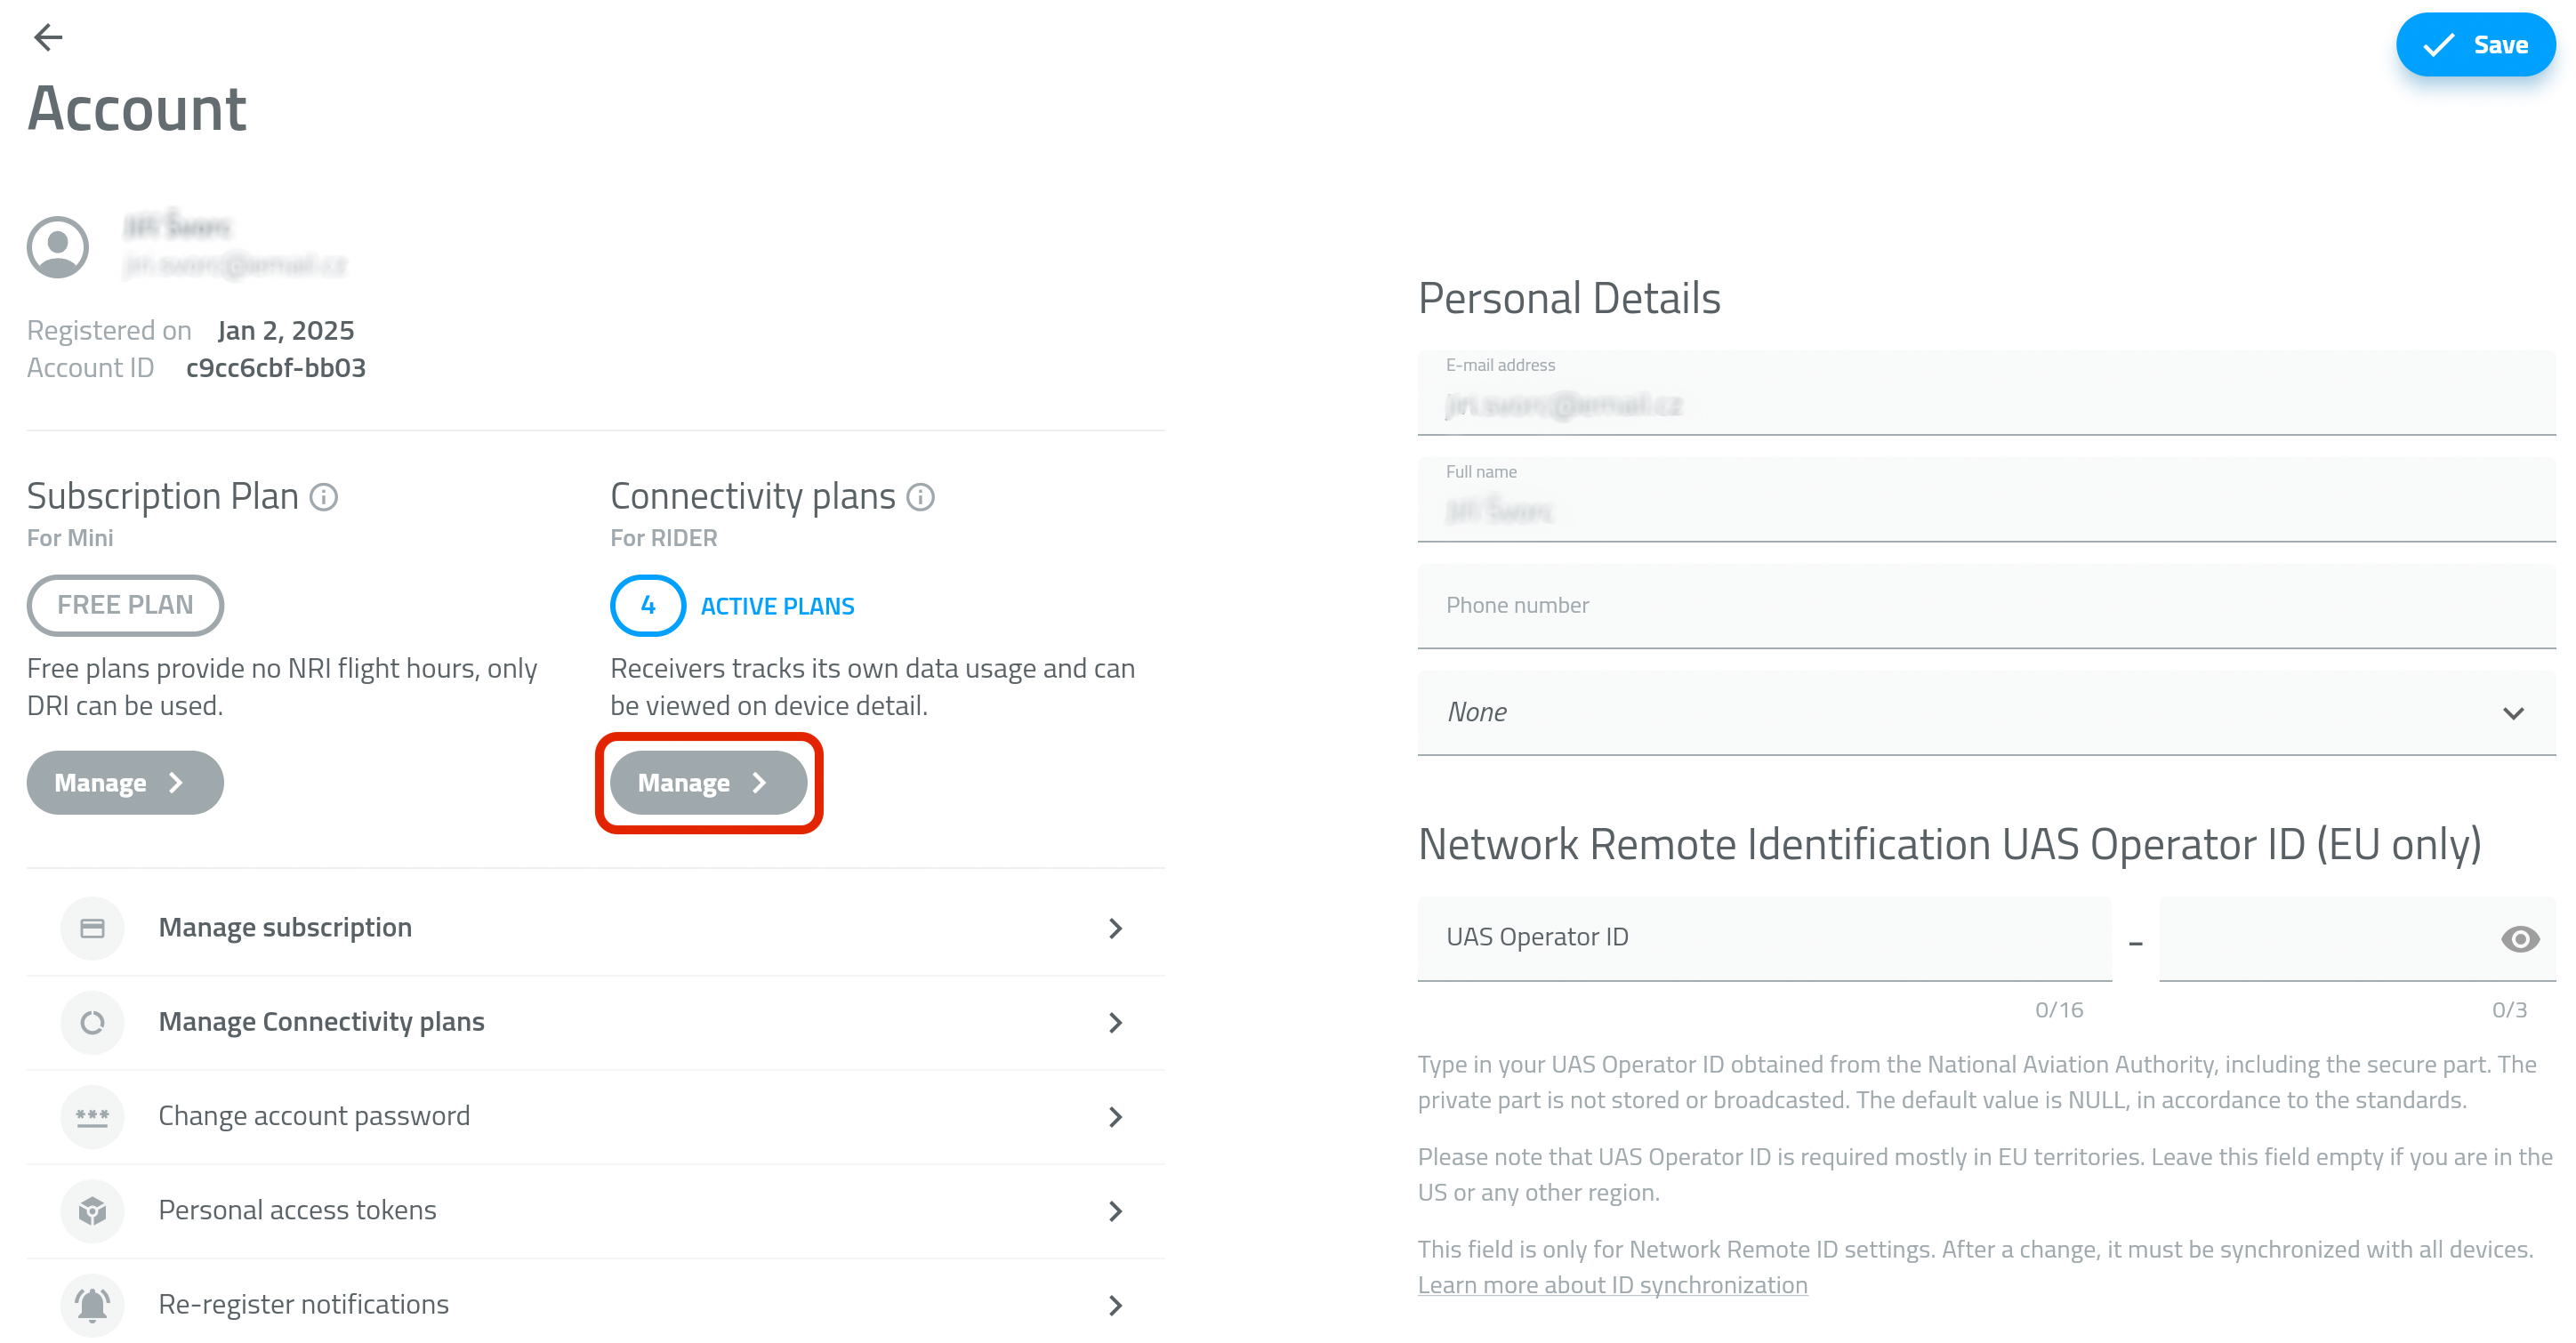
- Open the Profile tab and go to Account details.
- In the Connectivity plans section, tap Manage - PICTURE 1
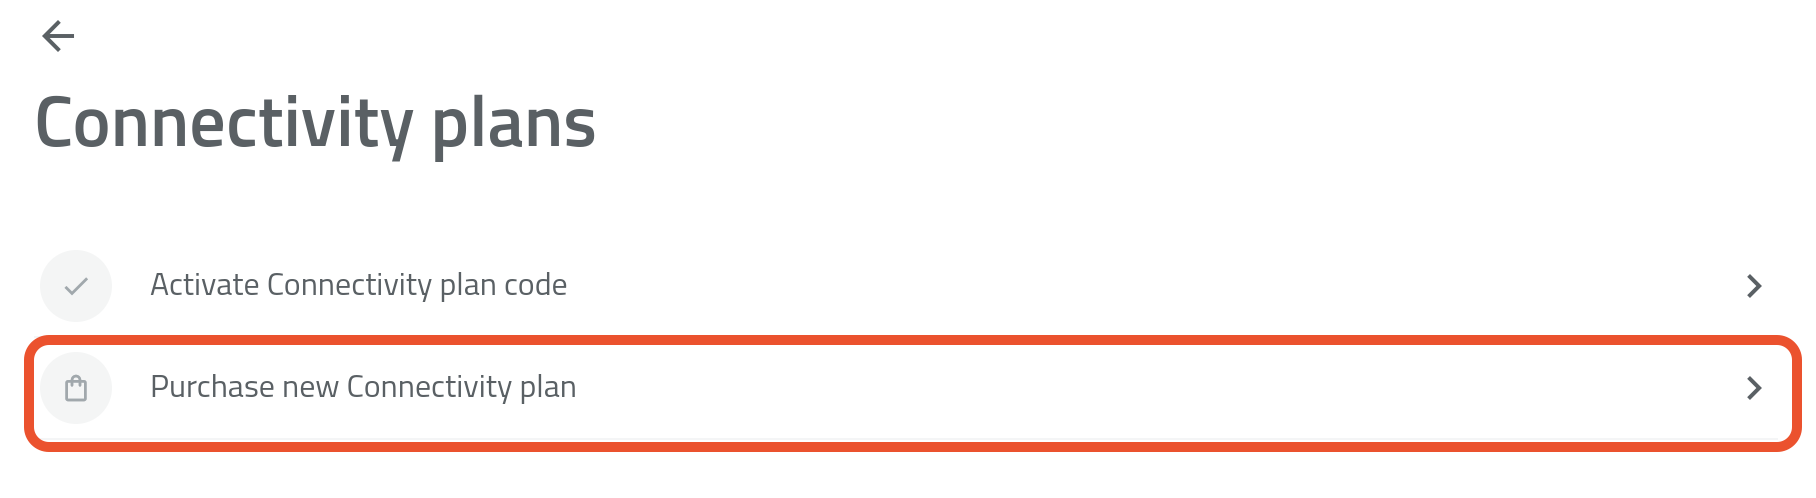
- Tap Purchase a New Connectivity Plan - PICTURE 2
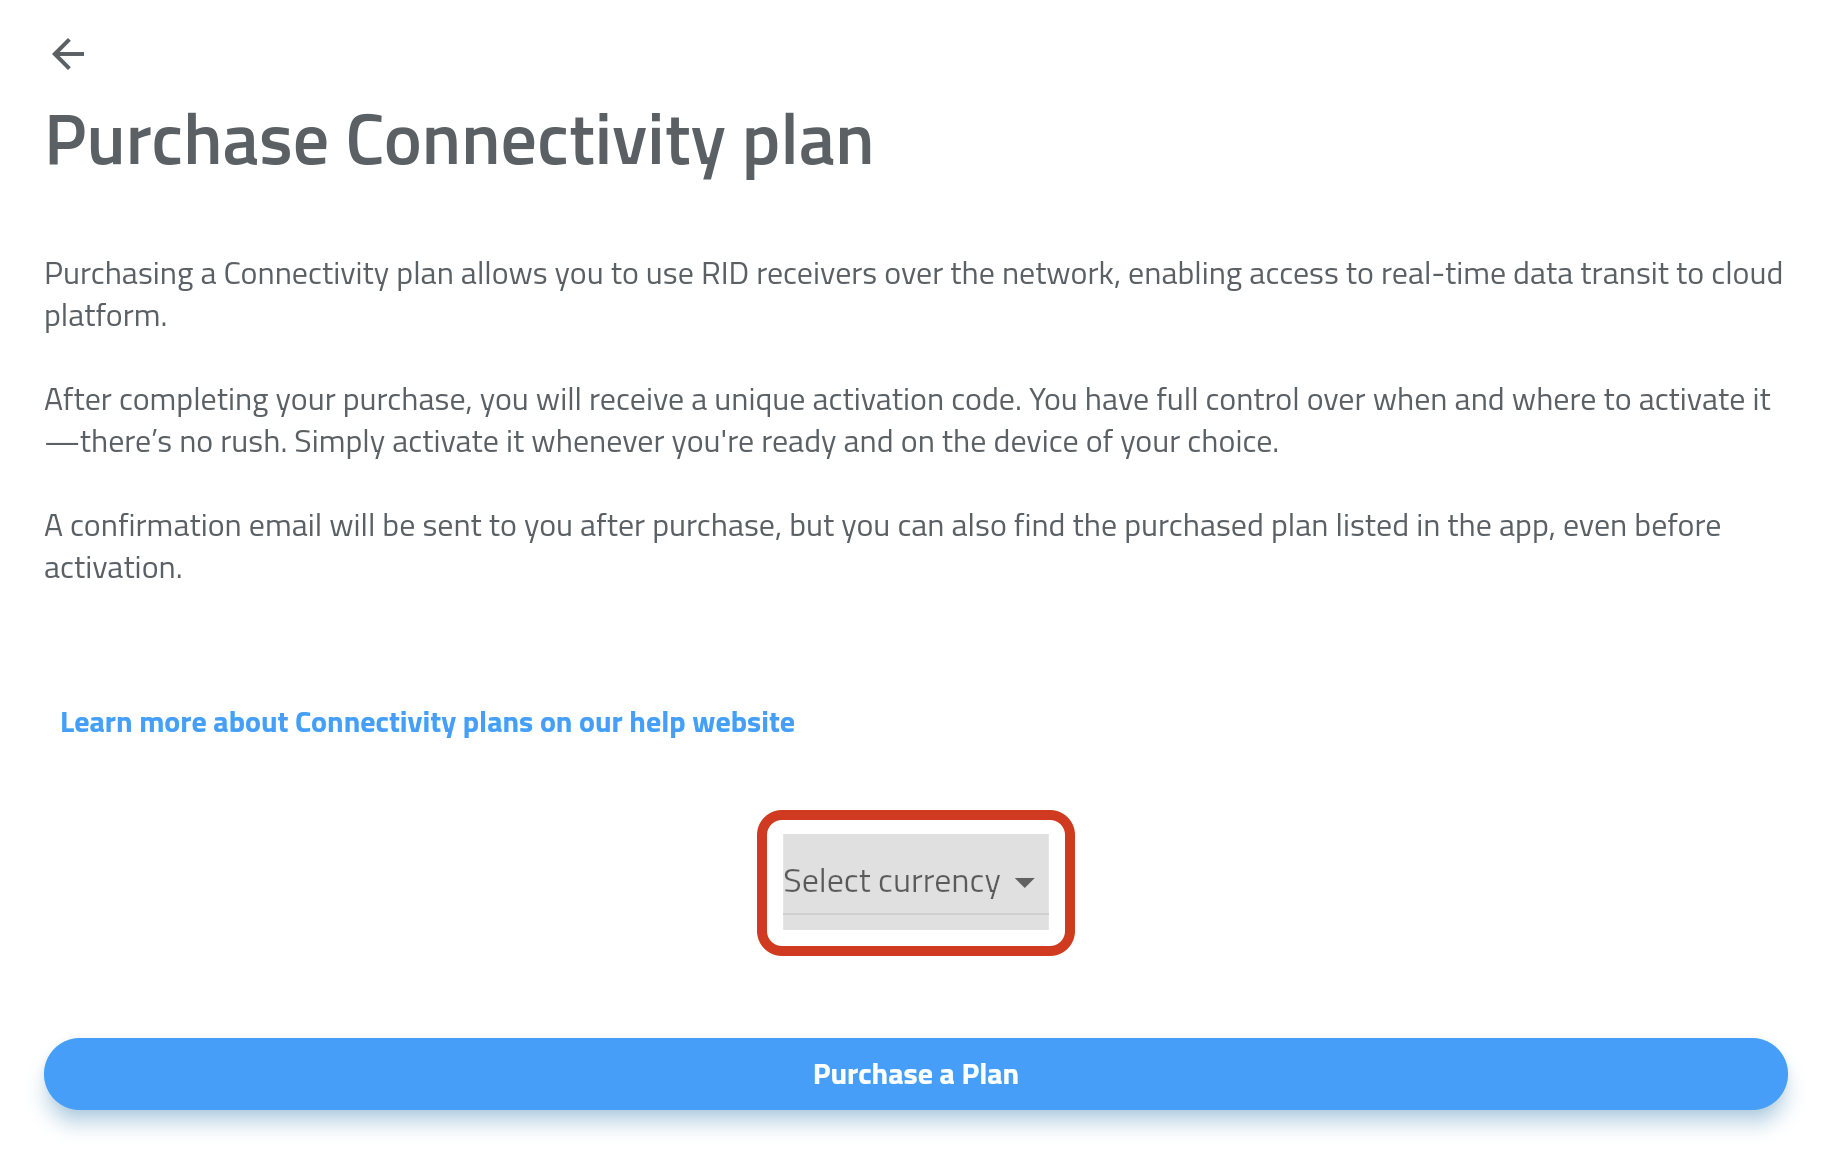
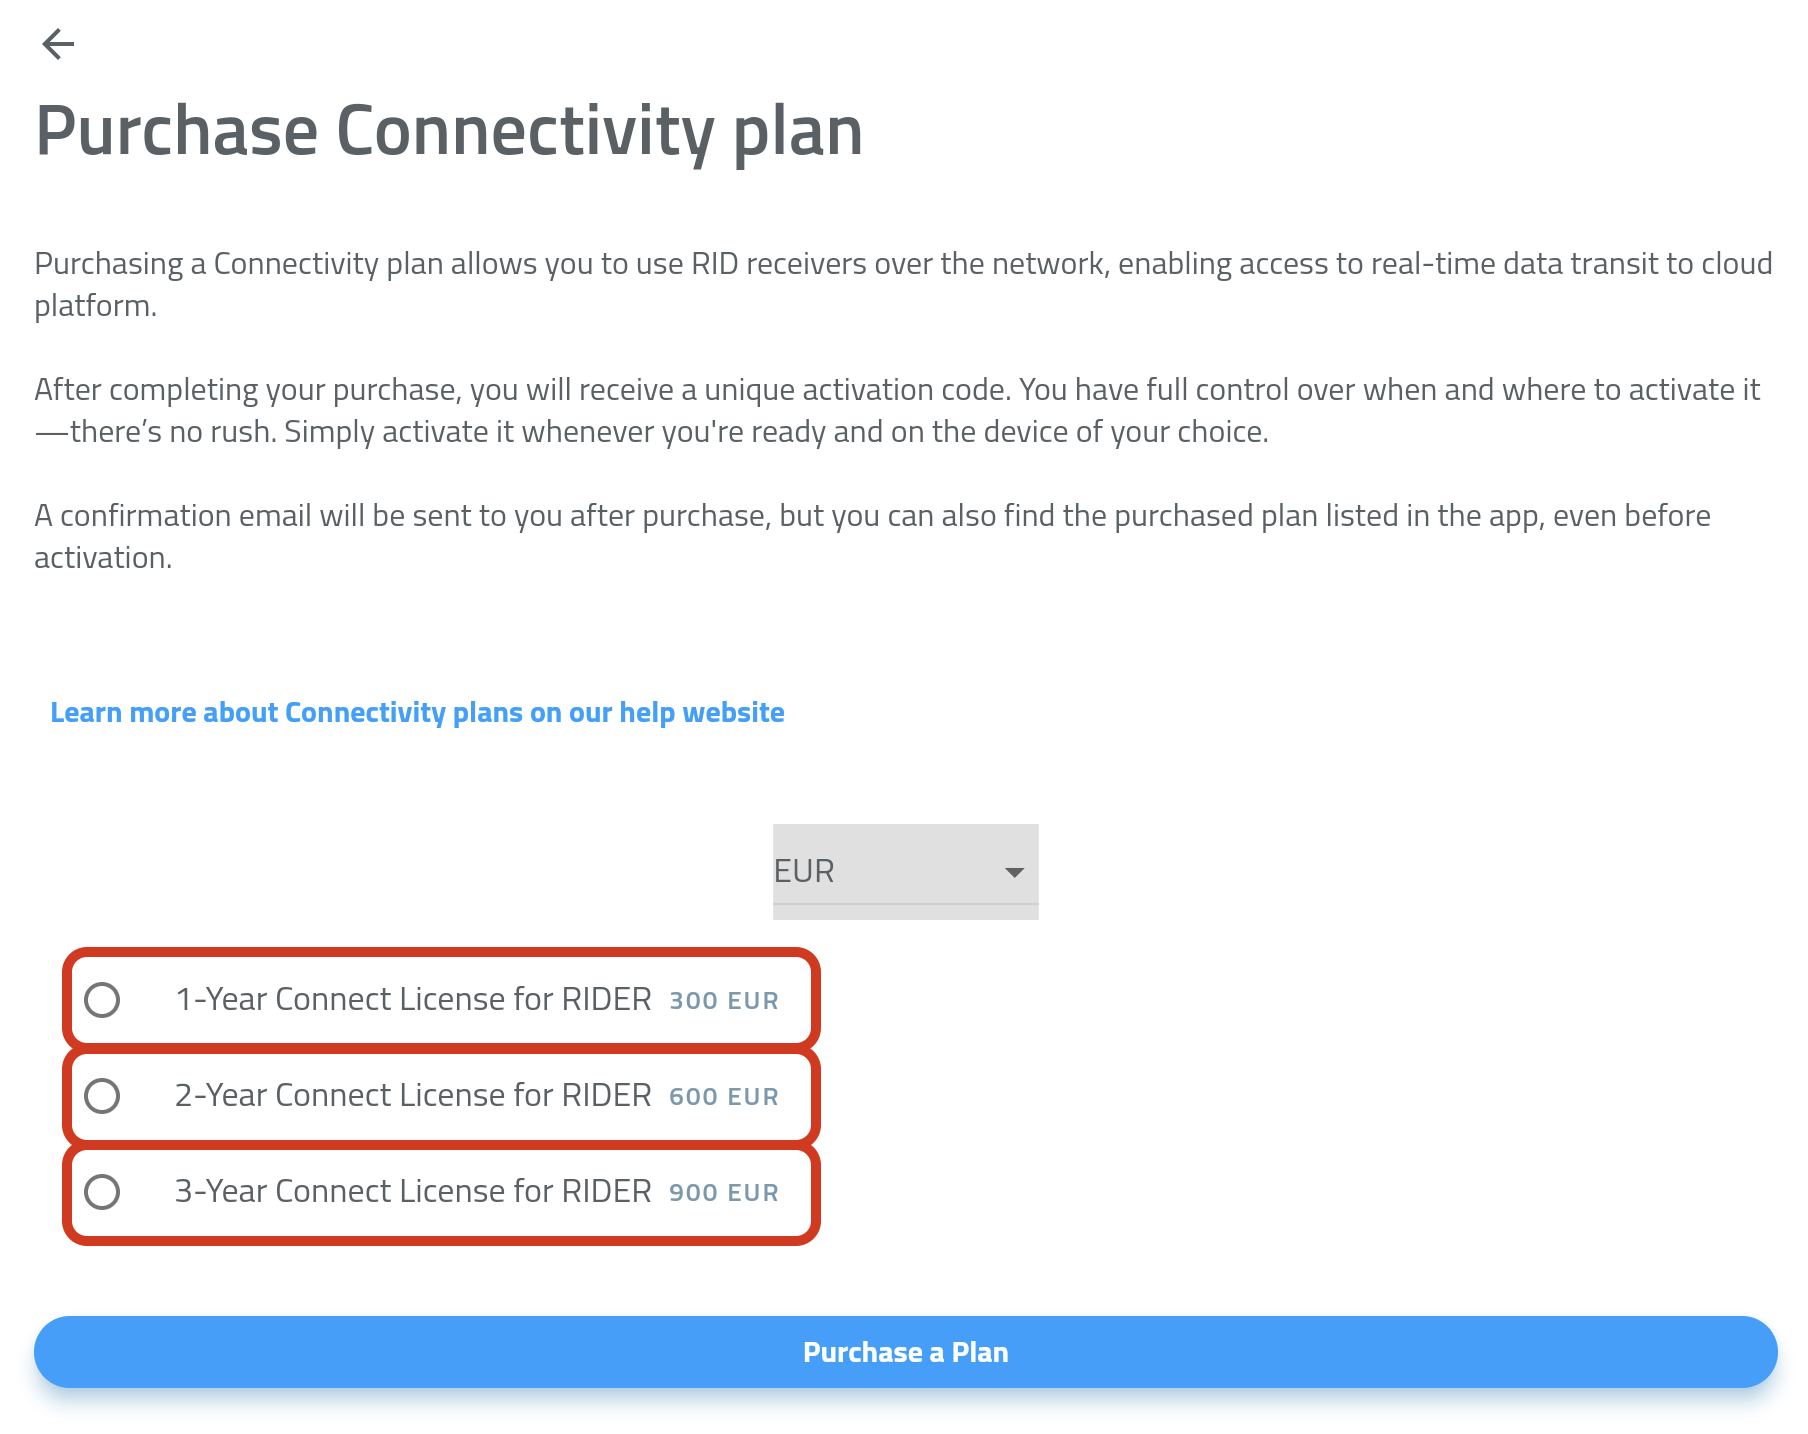
- If prompted, select your country and choose your preferred currency (EUR or USD) - PICTURE 3
- Select the Connectivity Plan you'd like to purchase (1, 2, or 3 years) - PICTURE 4
- Tap Purchase Plan.
- Complete the payment by following the instructions in the payment gateway.
Payment Methods
We accept the following payment methods:
- Credit Card
- Apple Pay
- Google Pay
All payments are securely processed via Stripe - we never store your payment information.
Every RIDER includes a free trial Connectivity Plan (valid for 2 months).
Once it expires, you can buy a new Connectivity Plan anytime to continue using Online Mode.
If you don’t purchase a Connectivity Plan, simply switch to Offline Mode via Drone Scanner (Gen. 2).


Troubleshooting Payments
If your payment doesn’t go through, check the following:
- Your card supports online/international payments
- Your billing details are correct
- Your bank has authorized the transaction (some cards require in-app confirmation)
- Apple Pay / Google Pay are linked to valid cards
If issues persist, try another payment method.
Still having trouble?
Contact support@dronetag.com and include a brief description or screenshot of the issue - we’ll help you fix it quickly.
Activating a Connectivity Plan:
- Open the Profile tab and go to Account details.
- In the Connectivity plans section, tap Manage - PICTURE 1
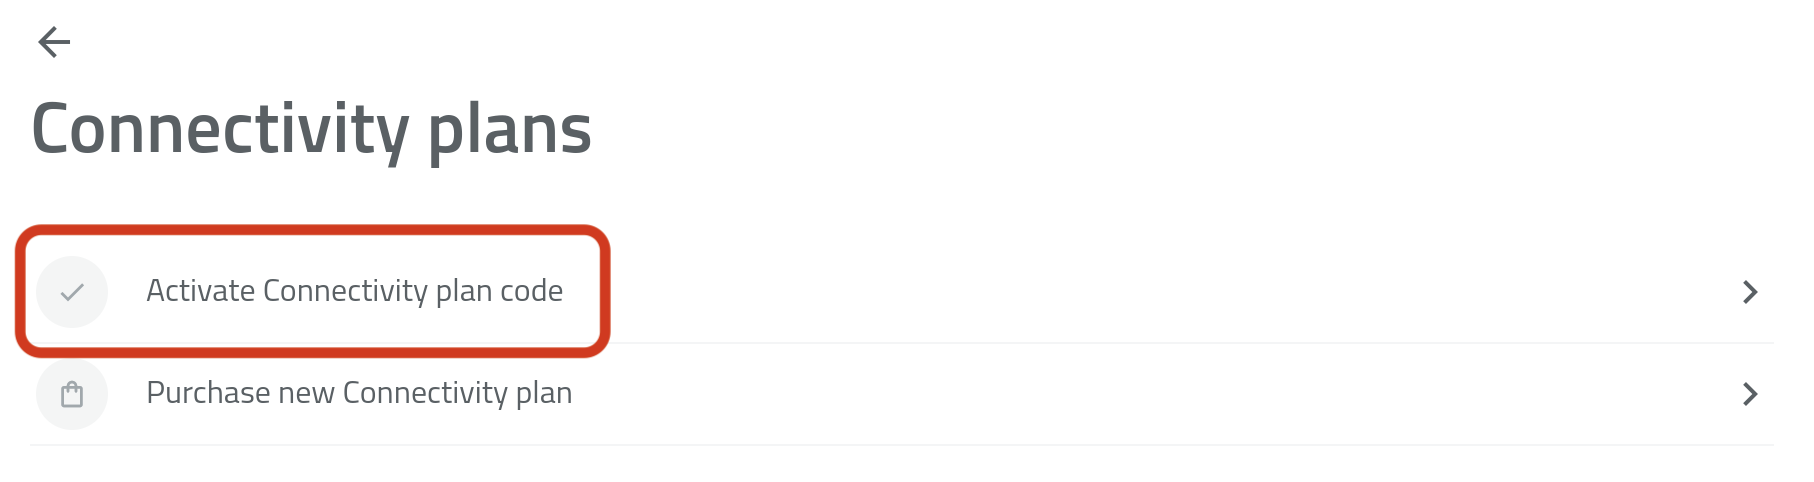
- Tap Activate Connectivity Plan Code - PICTURE 2
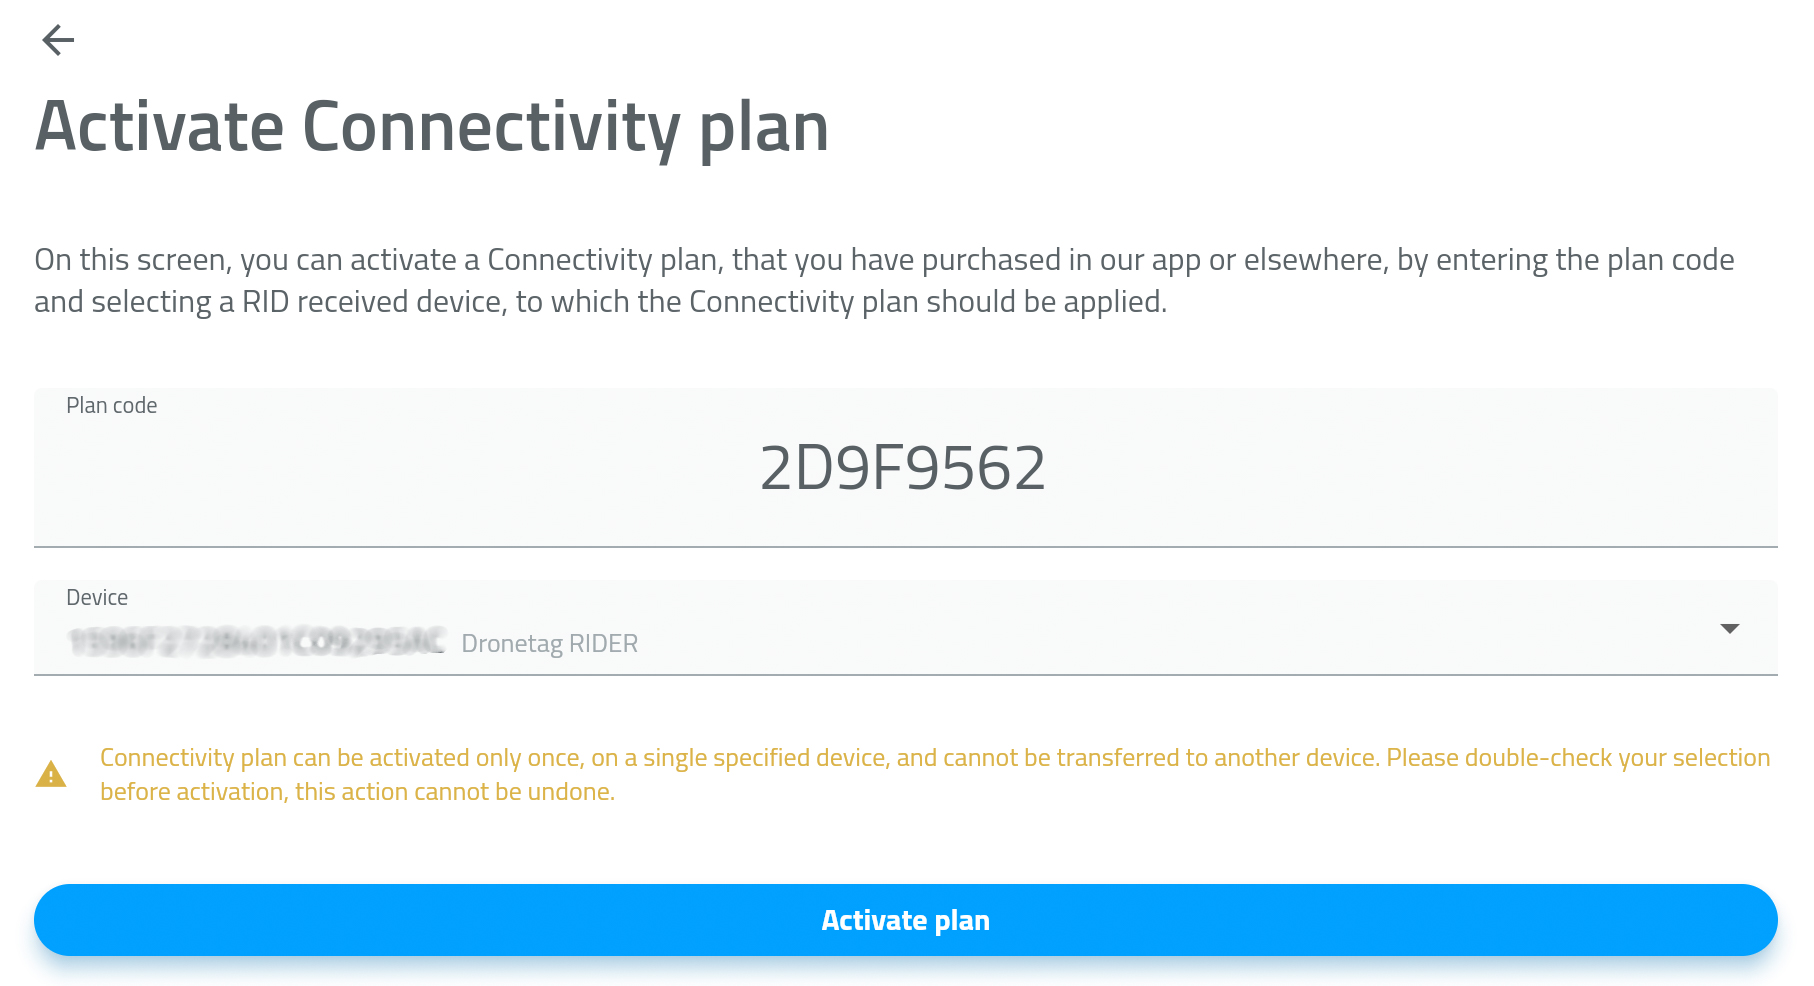
- Enter or paste the activation code from the previous screen.
- Select the RIDER device you want to activate the plan for - PICTURE 3
- Tap Activate Plan.
Your Connectivity Plan is active now.
Activating a subscription plan
Our subscription plans can be activated in our mobile & web app. To activate a subscription plan, you will need to have registered a Dronetag account.
Before you go purchase a subscription, check if you don't have an available trial. You can check this by navigating to the Profile and then My devices. Select the device for which you might have the trial available. On the device detail you will see the option to activate the trial. If you have multiple devices, you can check the trial eligibility in Profile → Account → Manage subscription.
Purchasing a new plan
Navigate to the Profile screen, tap on the account card, which will get you to the Account screen. On this screen, select Manage subscription. You will see a list of available subscription plans. Tap on the plan you want to purchase and follow the instructions.
You will be redirected to the payment page. Enter your credit card details. Be aware that unless you cancel the subscription, this credit card will be charged automatically monthly or yearly, depending on the plan you have chosen.
After you complete the payment, you will be redirected back to the app. Your subscription will be activated immediately, check your profile to see that the subscription is active.
If not, please give it a few minutes and try again. If you still cannot see the subscription active after a few minutes, check if the payment went through and was not denied. In either case, you can contact us at support@dronetag.cz.
Payment methods
You can pay for your subscription using a credit card, PayPal, Apple Pay or Google Pay. We use Stripe to process credit card payments. We do not store any credit card information on our servers.
Changing or renewing your plan
You can change your subscription plan at any time. See the ‘Changing the plan’ section for more information on how to do that.
If you previously canceled your subscription, you can renew it at any time. See the ‘Renewing the plan’ section for more.
Cancelling your subscription
At Dronetag, we understand that your needs may evolve, and circumstances can change. Therefore, we've made the process of unsubscribing straightforward, ensuring you have the flexibility to manage your subscription at any time.
How to cancel your subscription
You can cancel your subscription at any time. Cancelling your subscription will prevent any future charges to your credit card.
Don't worry, you will still have access to your subscription until the end of your current billing period.
Follow these steps to cancel your subscription:
- Login to your Dronetag account
- Access your account via our web or mobile app
- Navigate to the Subscription page
- First, open the Profile page by tapping the button in the top-right corner on the app's main screen
- Then, tap the profile card with your name to get to the Account page
- Finally, tap the Manage subscription button
- Select “Cancel your current plan”
You will be redirected to the Stripe portal. Follow the instructions to cancel your subscription.
If you do not have any overdue invoices, you can cancel the plan by tapping the Cancel plan button. After you confirm the cancellation, you can return back to the Dronetag app. You will still see the same plan active until the end of the current billing period.
Renewing the plan
If you change your mind, you can renew your subscription at any time. You can do so by tapping the Renew plan button on the Subscription page. In some cases, you might be redirected to the Stripe portal to confirm the renewal. Follow the instructions to renew your subscription.
Checking the status and usage
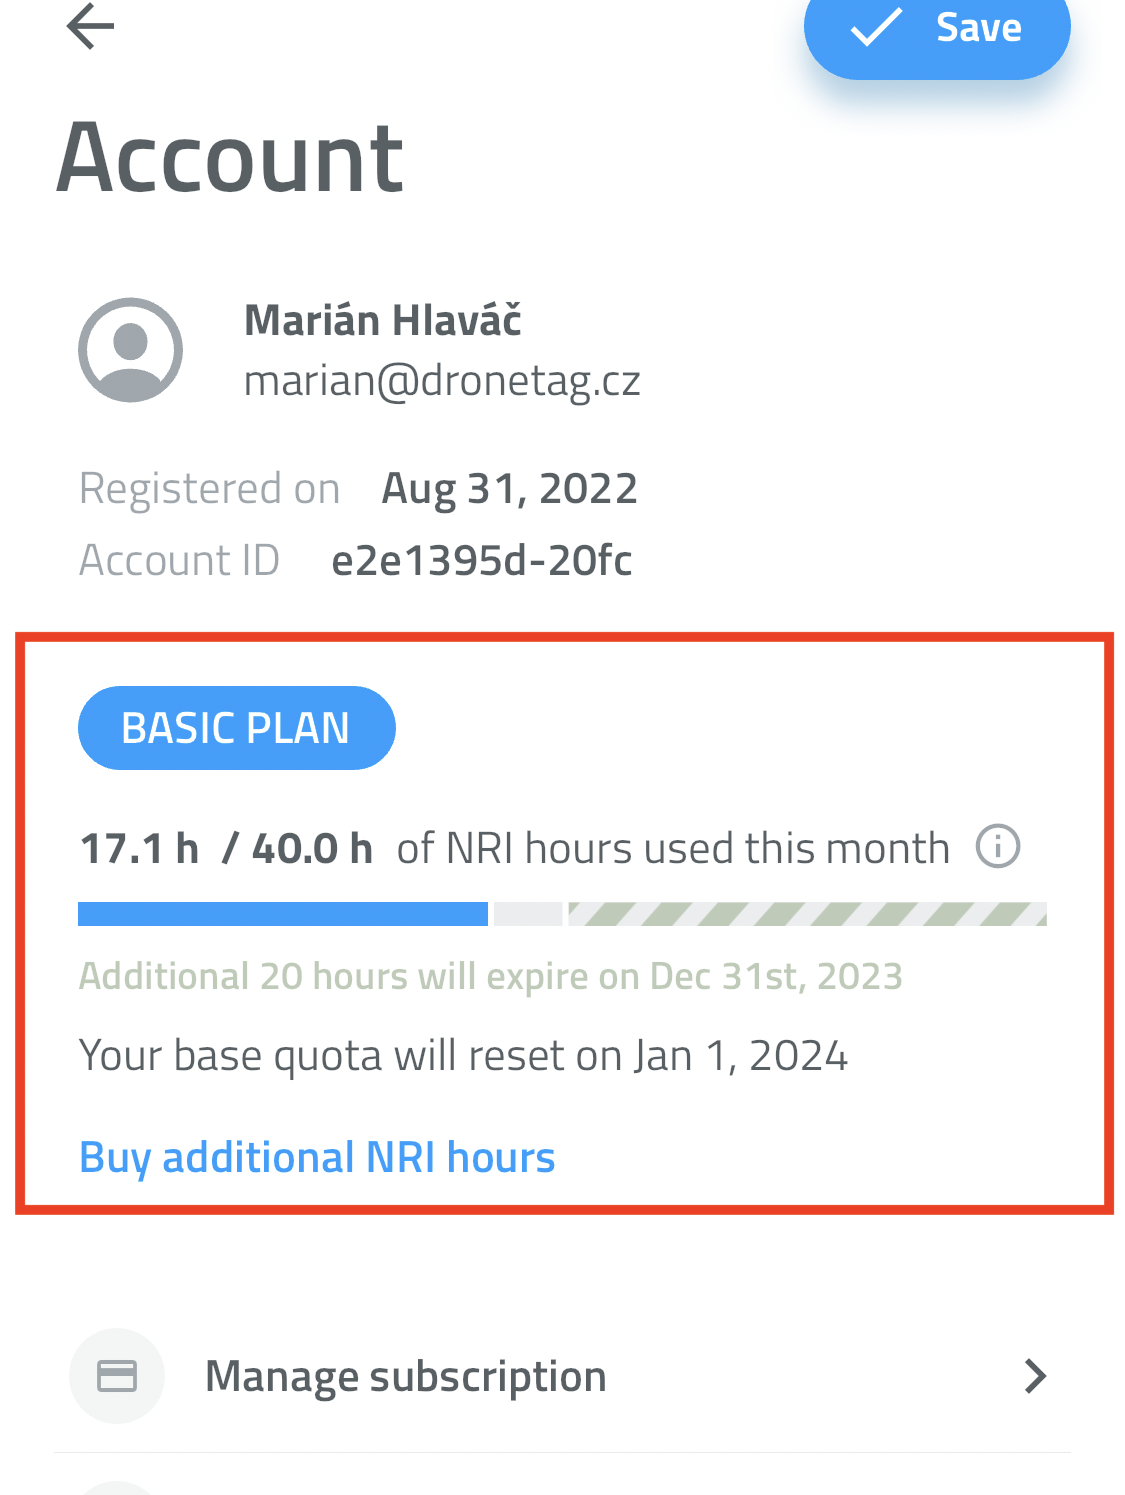
The current state of your subscription and flight hours usage can be checked in our mobile & web app.
Open the Profile screen and tap on the profile card with your name to get to the Account screen. There you can see the current state of your subscription and flight hours usage for the current billing period.
The simple chart visualizes the usage of your flight hours. The blue part represents the flight hours that you have used up, the grey part represents the flight hours that you have not used up yet, and the green part represents the additional flight hours that you have purchased and not used up yet.
What are NRI hours?
NRI stands for Network Remote ID, and "NRI hours" is the monthly limit of the number of hours that you can use your Dronetag over the network. However, this limit does not apply to the usage of your Dronetag over Bluetooth. You can use your Dronetag over Bluetooth as much as you want.
What happens when flight hours are used up
When you have used up all your flight hours, you will not be able to fly your drone until the quota gets renewed at the beginning of the next billing period.
If you need to continue flying this month, you'll need to upgrade your plan or buy additional NRI hours.
Buying additional flight hours
You can purchase additional flight hours by tapping the Buy additional NRI hours button on the Account screen. You will be redirected to the Stripe portal to complete the purchase. After you complete the purchase, you can return back to the Dronetag app. You will see the additional flight hours added to your account.
Notice that the additional flight hours have a separate expiry date. They do not expire at the end of the current billing period, but at their own expiry date.
Example: On January 15th you exhausted all your 20 flight hours. You purchased an additional 20 hours. Your billing period ends on January 31st, but the additional 20 hours expire on February 15th.
Changing the plan
Changing the plan can get complicated, but we're trying to make it as easy as possible. You can switch the subscription right away and use the features from the new plan immediately.
You can change your subscription plan anytime. If you change your plan, the next billing period you will be charged for the new plan together with a prorated amount for the remainder of the current month based on the new plan's pricing.
Questions & support
If you have any questions or concerns regarding the subscription, please don't hesitate to contact us. We're here to ensure your Dronetag experience is as seamless as possible.
Visit our contact page if you wish to get in touch with us.
Source pages
Every chapter of this document is a page of the Dronetag help site. Use these addresses to reach the latest version.
- 1Subscriptionshelp.dronetag.cz/dronetag-app/subscriptions/
- 2Checking Connectivity Plan Statushelp.dronetag.cz/dronetag-app/subscriptions/RIDER/checking
- 3Purchasing a Connectivity Planhelp.dronetag.cz/dronetag-app/subscriptions/RIDER/purchasing
- 4Activating a Connectivity Plan:help.dronetag.cz/dronetag-app/subscriptions/RIDER/activating
- 5Activating a subscription planhelp.dronetag.cz/dronetag-app/subscriptions/transmitters/activating
- 6Cancelling your subscriptionhelp.dronetag.cz/dronetag-app/subscriptions/transmitters/cancelling
- 7Checking the status and usagehelp.dronetag.cz/dronetag-app/subscriptions/transmitters/usage