
On-Premise Tablet
- Document
- On Premise Dronetag Solution — On-Premise Tablet
- Chapters
- 2
- Source
- help.dronetag.cz/print/on-premise/tablet
Quick Start
The On-Premise Tablet is a ready-to-use hardware solution, typically used for evaluation purposes.
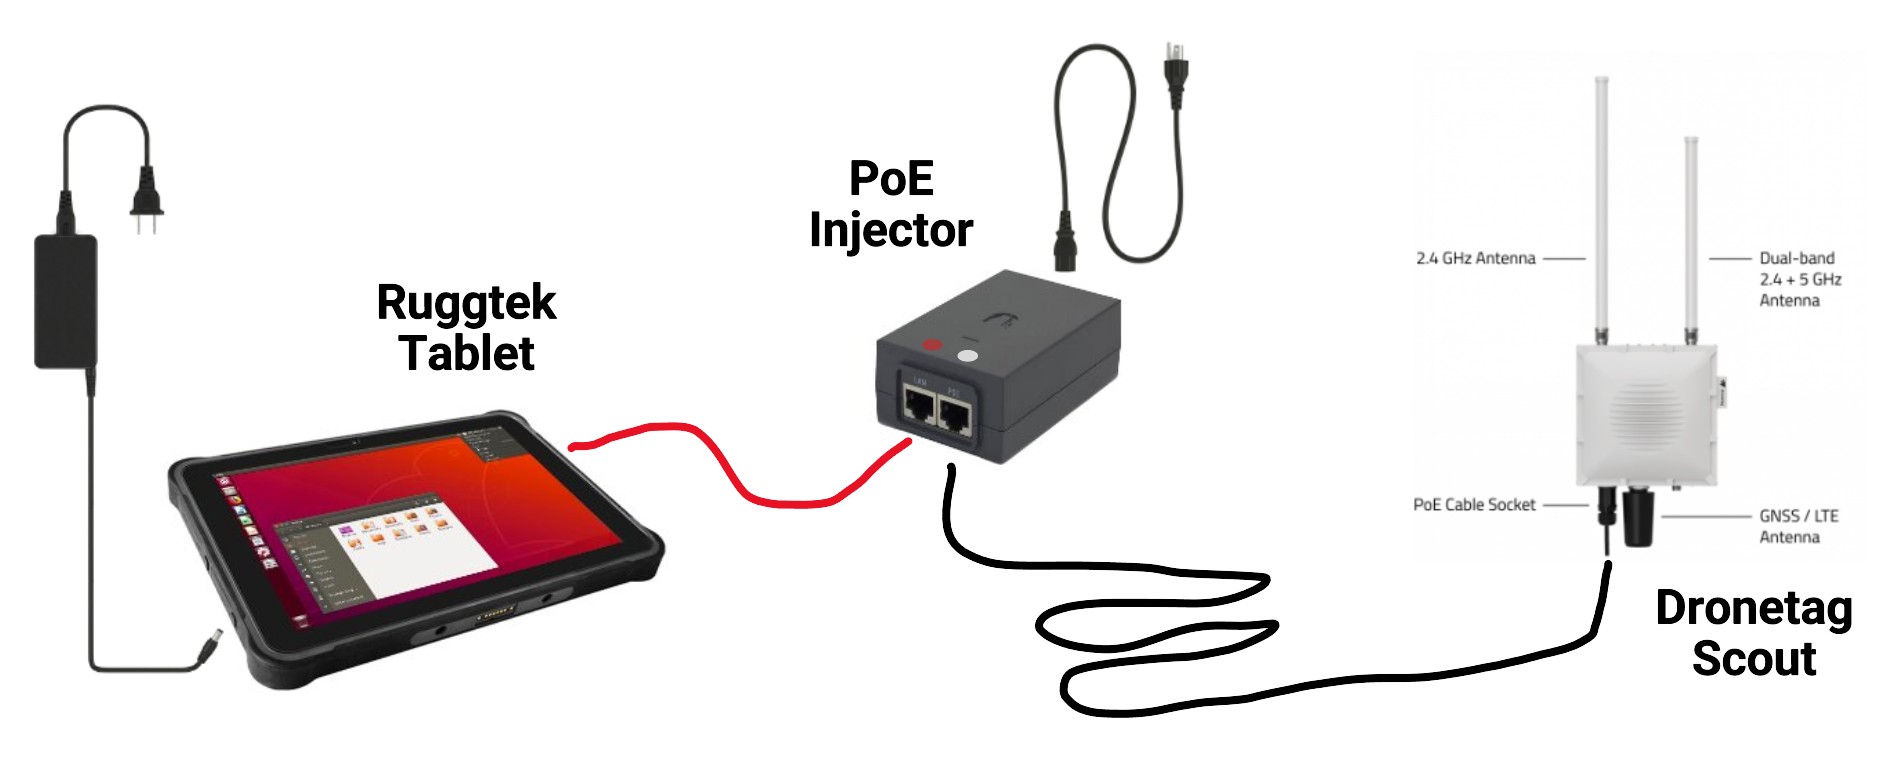
Note that the tablet is not just a graphical display. It is a Linux server with pre-installed Dronetag On-Premise Platform. If connected to a network, it provides an HTTP server to serve the application to web browsers.
1. Set Up the On-Premise Tablet
- Connect the power source and Ethernet cable to ports located at the left edge of the tablet.
- Connect Dronetag Scout with the tablet. As Dronetag Scout needs Power-over-Ethernet, it is necessary to plug a PoE injector (provided) between the two devices.
- Make sure that the tablet is connected to the slot marked "LAN", while Dronetag Scout is connected to the slot marked "PoE".
- Press the power button on the top.
- Wait for the system to boot up and show a graphical map.
2. Check that the setup is working
If the devices are connected correctly, you should see a small banner in the top-left corner of the screen, showing a green dot and 1 online.
References
- The guide on configuring your Dronetag Scout.
- The guide on accessing the web app to visualize the data you have captured.
- Please note that the On-Premise version of Dronetag App is limited and many functions described in the guide are missing there.
Advanced Tablet Configuration
Accessing the Settings
The tablet runs in so-called "kiosk" browser mode. To access advanced settings, you first need to exit this browser mode. This can be done by swiping three fingers from the bottom side of the tablet up. When you do it, you should be able to access the standard Gnome Desktop Manager.
Connect to Wi-Fi
When using the tablet setup for scanning, you should always have your Wi-Fi turned off completely, to avoid interference with Remote ID broadcast.
However, there are situations when you want to connect the tablet to a Wi-Fi network for maintenance purposes. In such a case, click on the icon in the upper-right corner of the screen. The Wi-Fi menu item can be used to turn Wi-Fi on, select a network, and enter access credentials.
When the tablet is connected to public Internet, it will allow Dronetag support to connect to the device and help you with troubleshooting.
Do not forget to switch the Wi-Fi off after you are done and before you want to start scanning again.
Source pages
Every chapter of this document is a page of the Dronetag help site. Use these addresses to reach the latest version.
- 1Dronetag On-premise Tablethelp.dronetag.cz/on-premise/tablet/quick-start
- 2Advanced Tablet Configurationhelp.dronetag.cz/on-premise/tablet/advanced-configuration