
Flight Controller Configuration
This guide explains how to configure your flight controller to work with the Dronetag DRI module. It applies to all:
- Integration in EU
- Retrofit Integration in US
- Standard Remote ID for Manufacturers in US
Requirements
Before starting, make sure:
- You have a compatible flight controller (e.g., Holybro Pix32v5, Cube Orange, etc.)
- You’ve already flashed the correct firmware:
- Standard ArduPilot or PX4 for retrofit
- ArduPilot with OpenDroneID support for full integration; Note: PX4 currently does not support OpenDroneID
- How to create and flash firmware with OpenDroneID support is described on the page Unique firmware for Flight Controller
- You know which flight controller's serial/telemetry port is connected to Dronetag DRI (Port C)
- You’re using a supported configuration tool:
- QGroundControl (ArduPilot or PX4)
- Mission Planner (ArduPilot)
We will use the Holybro Pix32v5 flight controller in this guide.
Step-by-Step Guide
Choose the firmware running on your flight controller:
- ArduPilot
- PX4
Choose the configuration tool:
- QGroundControl
- Mission Planner
Connect to the Drone
Connecting your flight controller to your PC via USB is the fastest and most reliable method. QGroundControl should automatically connect to the most common devices. If your flight controller connects automatically, skip to Open the Vehicle Configuration. For the official guide to setting up the connection, follow the QGroundControl documentation.
SiK TelemetryConnection using a SiK telemetry radio does not require a physical connection between the flight controller and PC, but it is much slower to work with than the USB method. How to use the Holybro SiK radio is described on the page Holybro SiK Radio V3 documentation.
SiK Telemetry warningIf you decide to connect a SiK Telemetry through the Port-Forwarding feature of the DRI, do not connect RTS/CTS lines between the DRI and the SiK radio.
Manually Create the Link Profile
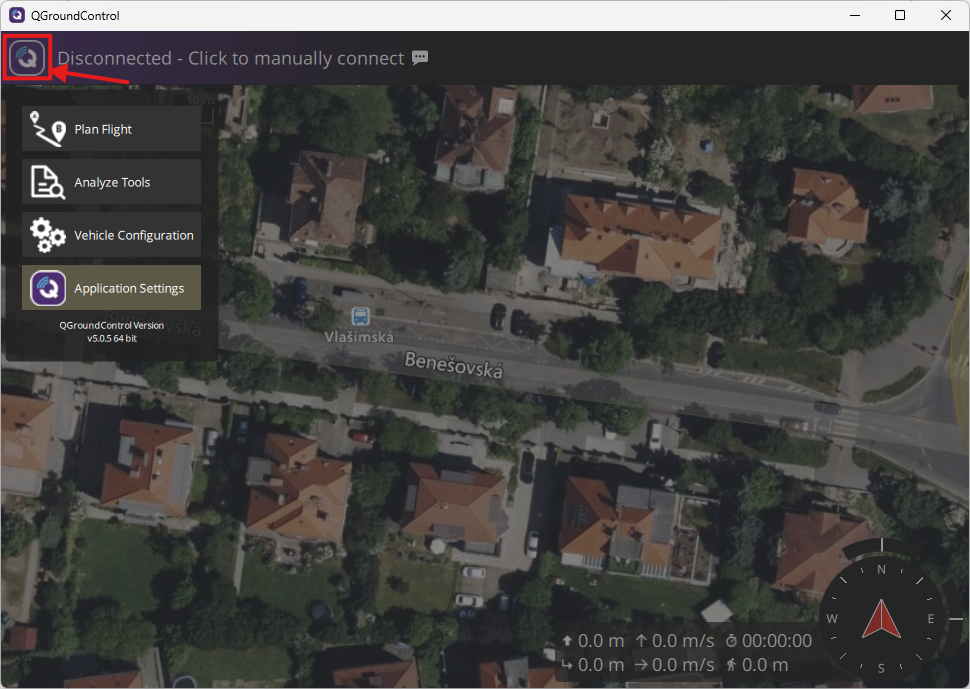
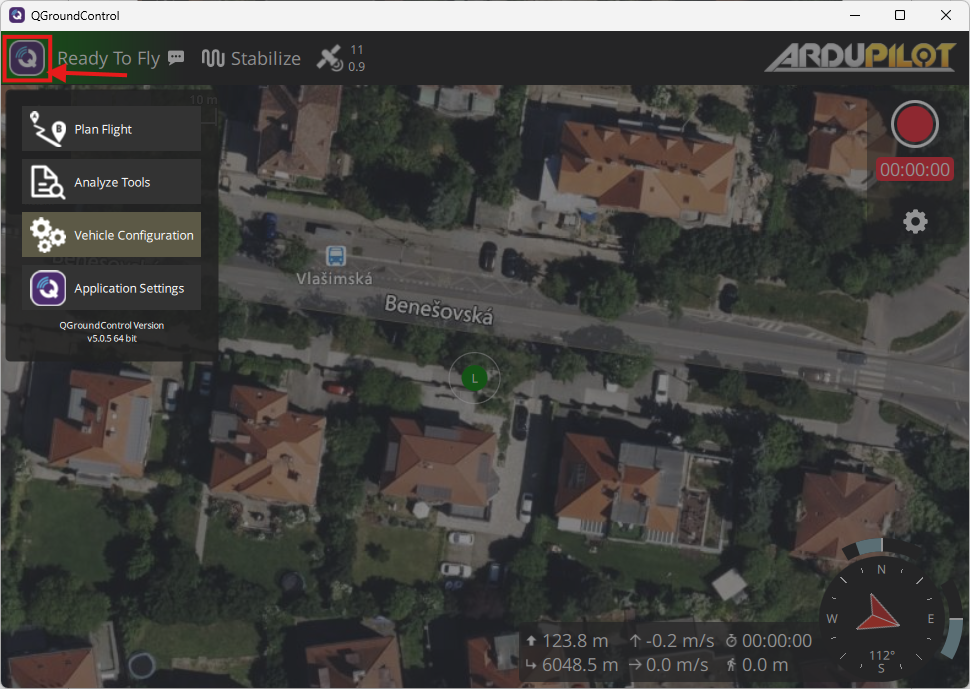
- Open the QGroundControl menu by clicking on the QGroundControl icon in the top left corner and select Application Settings.
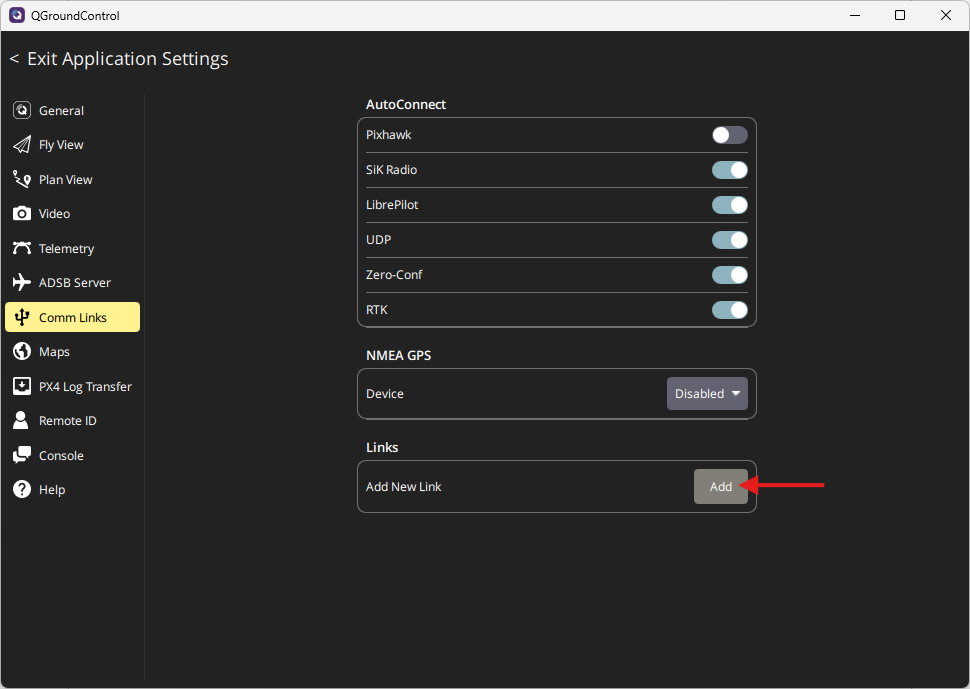
- In the Application Settings window, select Comm Links and then select the Add New Link option to open the Add New Link form.
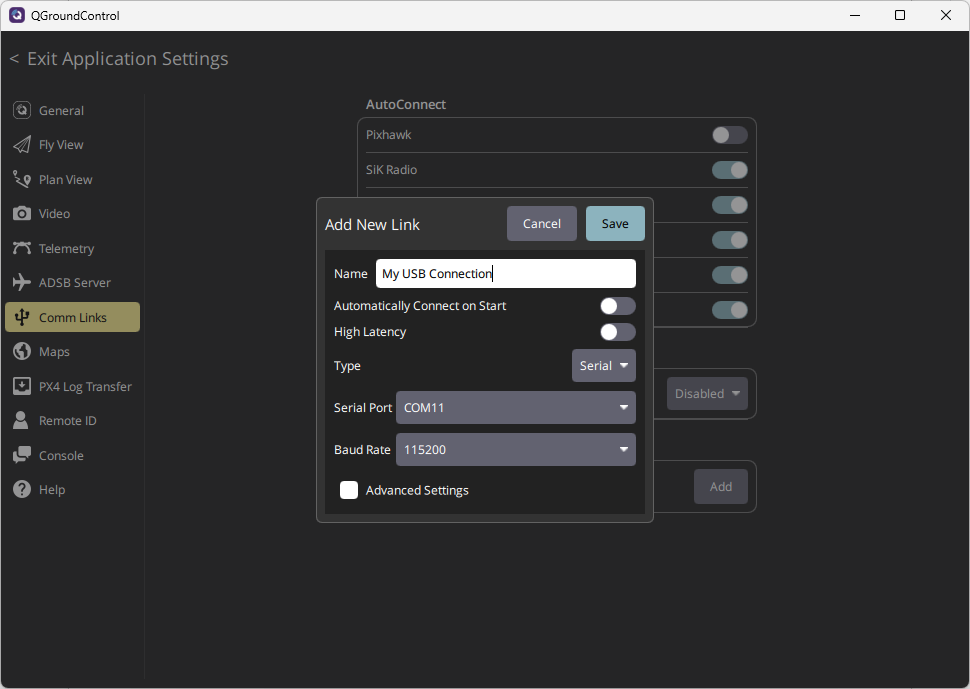
- In the Add New Link form, enter the name of the profile, select the flight controller serial port, and set the baud rate to 115200.
- Return to the main window.
Connect Using Prepared Link Profile
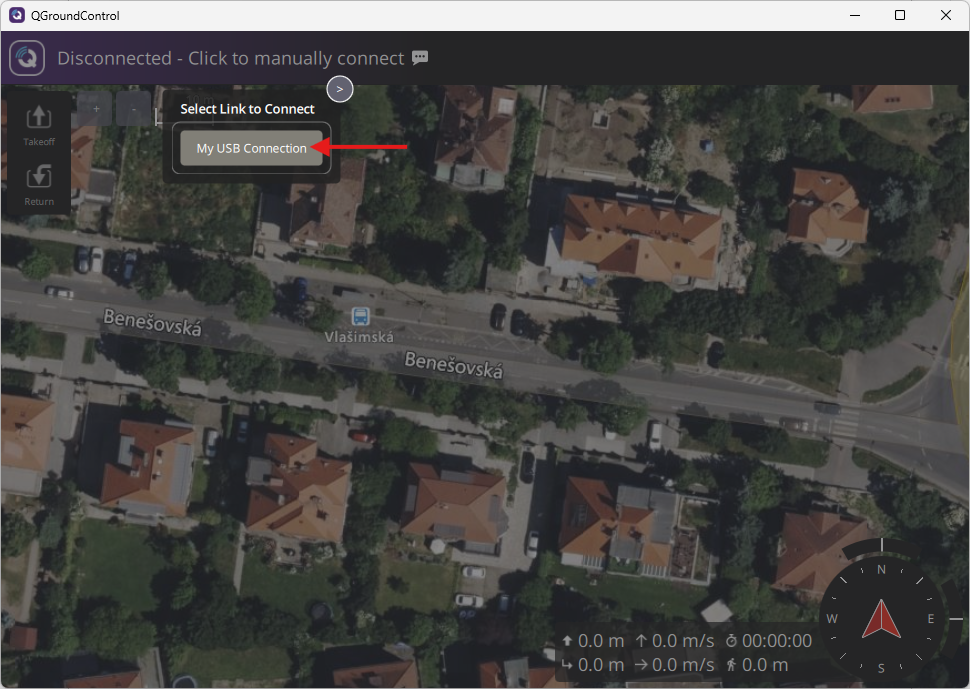
- In the main window, click on "Click to manually connect" and select your link profile. If QGroundControl can't connect to the flight controller, please check the correctness of the link profile created during step Manually Create the Link Profile.
Open the Vehicle Configuration
- Open the QGroundControl menu by clicking on the QGroundControl icon in the top left corner and select Vehicle Configuration.
Configure Parameters
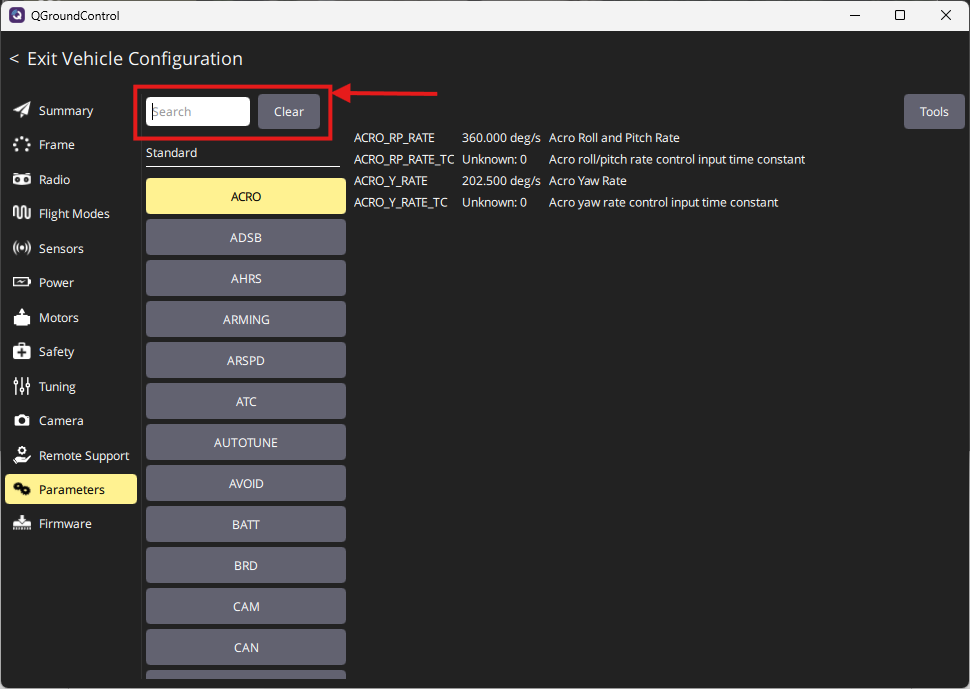
In the Vehicle Configuration window, select Parameters in the menu and then use the parameter search.
Search for the following parameters and set the correct values, where 'x' denotes the serial port number the DRI is connected to:
SERIALx_PROTOCOL = MAVLink2 protocolSERIALx_BAUD = 115200 baudBRD_SERx_RTSCTS = Disabled
If you want to enable OpenDroneID support, then set the additional parameters:
DID_ENABLE = Enabled(Enable OpenDroneID support)DID_MAVPORT = x(Set the port to which the DRI is connected)
infoTo set up your flight controller to support OpenDroneID, the flight controller must run unique firmware. The guide Standard Remote ID for Manufacturers in USA describes this integration process.
Validate MAVLink Communication
After configuration of the parameters, the DRI should communicate with the flight controller. We can check if the correct messages are received by the flight controller.
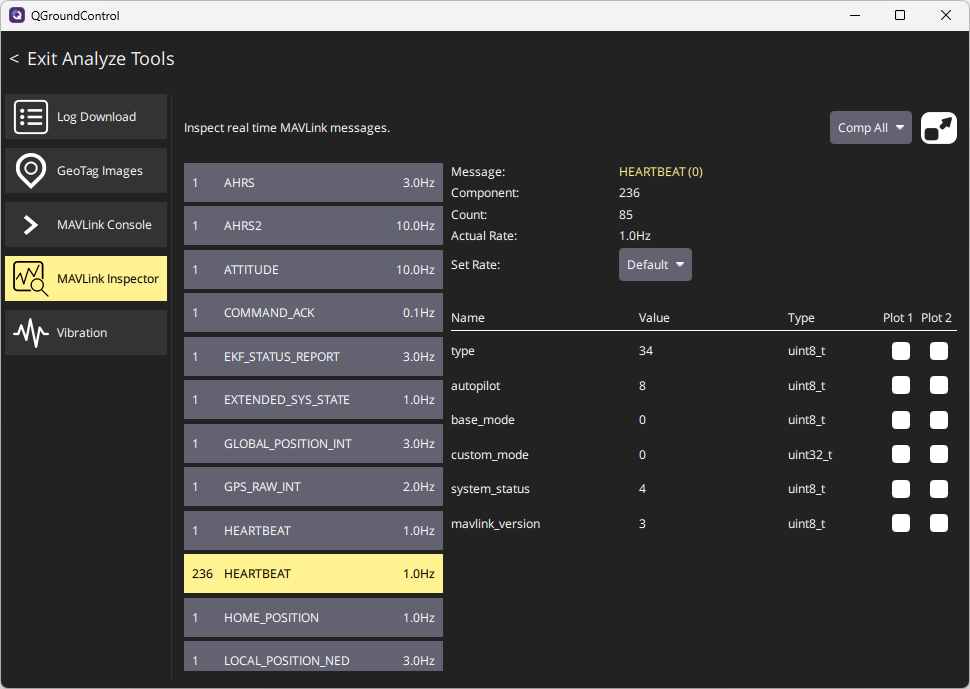
To view MAVLink communication statistics, switch to Analyze Tools - MAVLink Inspector. There is a list of received MAVLink messages and the frequency of their reception.
Check if there is the following message from ID 263:
MAVLINK_MSG_ID_HEARTBEATIt should look like the image:
Connect to the Drone
Connect your flight controller to your PC via USB. This is the fastest and most reliable method.
SiK TelemetryConnection using a SiK telemetry radio does not require a physical connection between the flight controller and PC, but it is much slower to work with than the USB method. How to use the Holybro SiK radio is described on the page Holybro SiK Radio V3 documentation.
SiK Telemetry warningIf you decide to connect a SiK Telemetry through the Port-Forwarding feature of the DRI, do not connect RTS/CTS lines between the DRI and the SiK radio.
Connect Using Serial Port
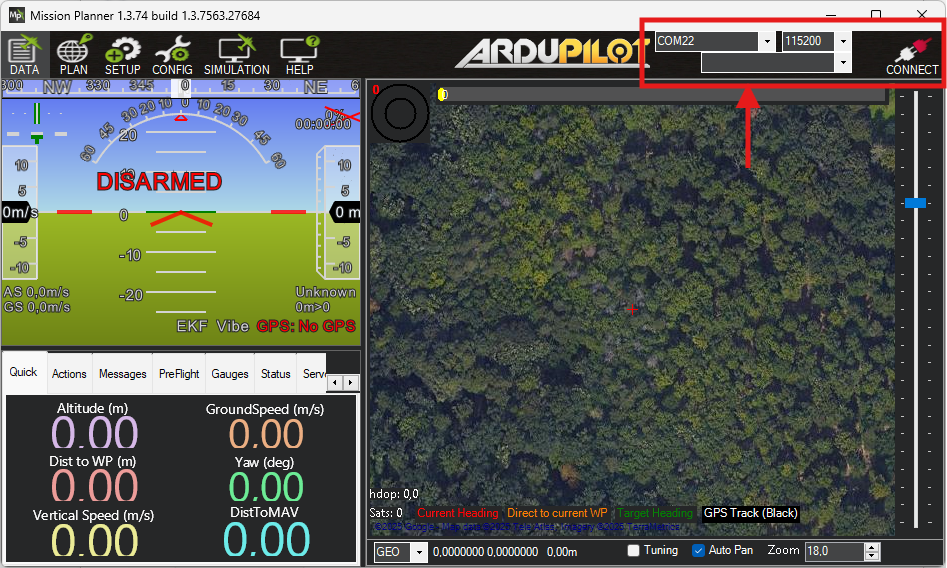
In Mission Planner, configure the connection port and baud rate in the upper right corner of the Mission Planner window. The USB connection baud rate should be 115200. Then press the Connect button. If you need help setting up the connection, follow the ArduPilot with Mission Planner documentation.
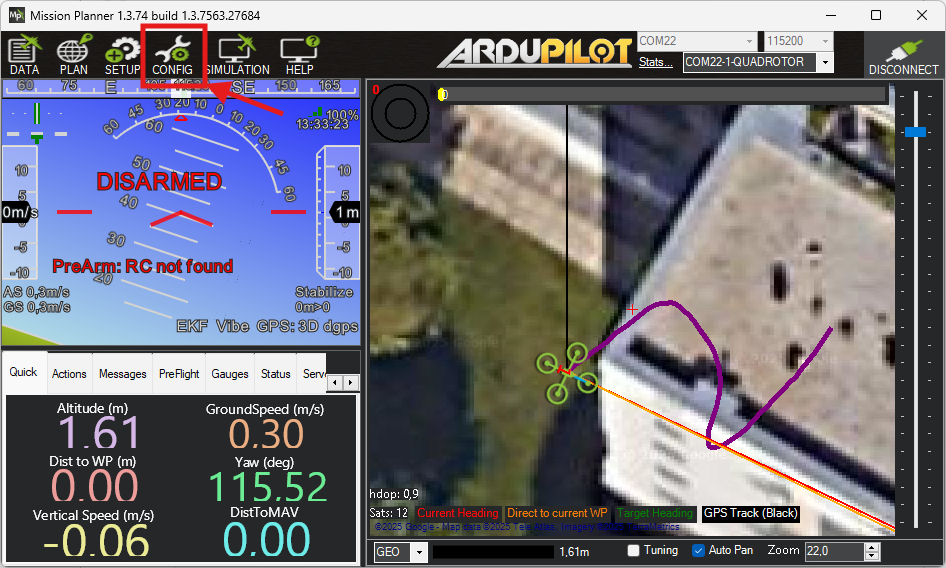
Open Config Window
Configure Parameters
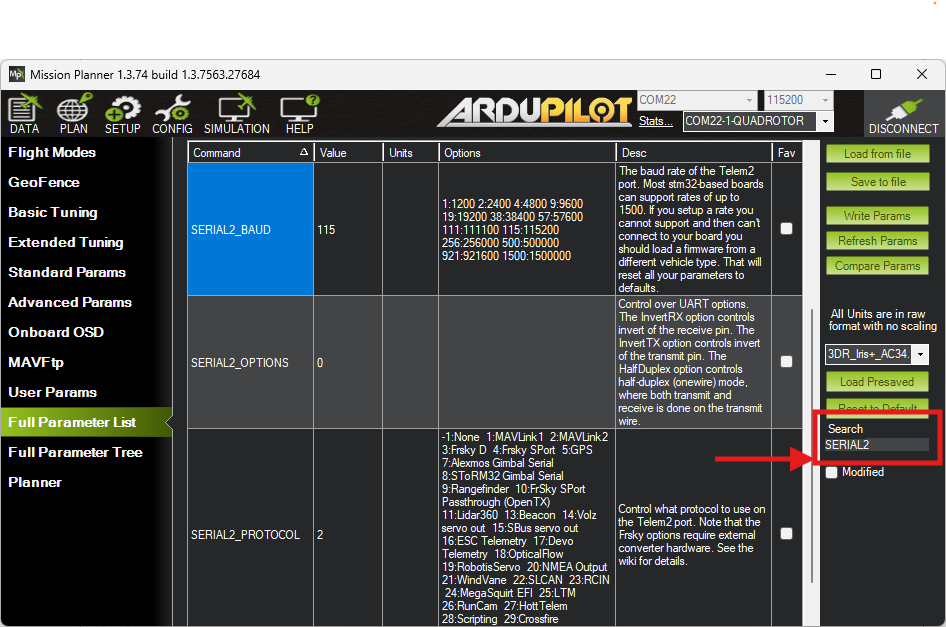
In the Config window, select Full Parameter List in the menu and then use the parameter search.
Search for the following parameters and set the correct values, where 'x' denotes the serial port number the DRI is connected to:
SERIALx_PROTOCOL = 2(MAVLink2 protocol)SERIALx_BAUD = 115(115200 baud rate)BRD_SERx_RTSCTS = 0(Disabled flow control)
If you want to enable OpenDroneID support, then set the additional parameters:
DID_ENABLE = 1(Enable OpenDroneID support)DID_MAVPORT = x(Set the port to which the DRI is connected)
infoTo set up your flight controller to support OpenDroneID, the flight controller must run unique firmware. The guide Standard Remote ID for Manufacturers in USA describes this integration process.
Validate MAVLink Communication
After configuring the parameters, the DRI should communicate with the flight controller. You can check whether the correct messages are being received by the flight controller.
Connection Method
- USB Cable
- SiK Telemetry
PX4 may not show a heartbeat over USB. Use a telemetry connection with forwarding enabled.
Connect using a telemetry radio and enable MAVLink forwarding.
Configuration Steps
Use QGroundControl to set the following parameters:
MAV_x_CONFIG = 102
MAV_x_FLOW_CTRL = 2
MAV_x_FORWARD = 1
MAV_x_MODE = 0
MAV_x_RADIO_CTL = 1
MAV_x_RATE = 1200
SER_TELx_BAUD = 115200
This setup enables basic MAVLink communication for Remote ID broadcast.
PX4 currently does not support full OpenDroneID integration. For details on current capabilities and supported hardware, refer to the PX4 Remote ID documentation.
Next Steps
For Remote ID compliance in the EU, continue with Confirm LED Status after FC Configuration in the Integration in EU guide.
For Remote ID compliance in the US through retrofit using a Dronetag DRI module, continue with Confirm LED Status after FC Configuration in the Retrofit Integration in USA guide.
For Standard Drone ID compliance in the US for manufacturers, continue with Configure the Ground Control Station in the Standard Remote ID for Manufacturers in USA guide.