
MAVlink (Pixhawk) Integration
The Beacon allows you to read sensor data from your MAVlink-compatible flight controller such as Pixhawk. Moreover, it can detect whether the drone is airborne or grounded and act accordingly by starting/ending the flight on your device.
Connecting to the MAVlink Flight Controller
The prerequisite for interconnection of the Dronetag device and flight controller is having the right cable. Please order an interconnection cable on our e-shop or make sure that you have a compatible one at hand. All the wiring must be as described below.
Dronetag Beacon Extension Port
The connector on Dronetag Beacon is a common JST SH 4-pin with UART interface with no flow control.
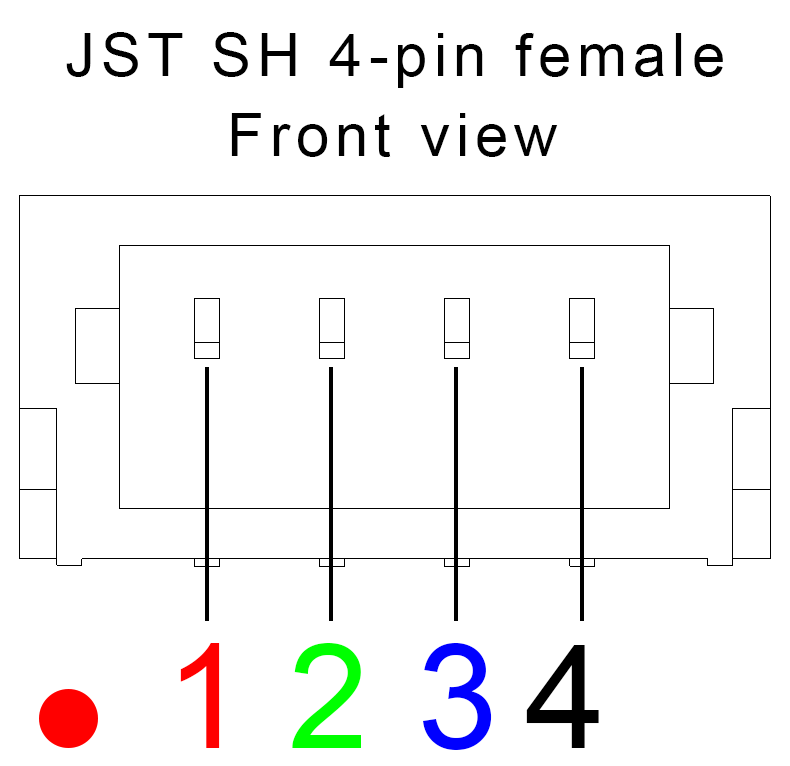
| Pin # | Name | Scheme Color | Description |
|---|---|---|---|
| 1 | VCC | Red | UART logic level, see instructions in the chapter below |
| 2 | UART RX | Green | Receive of the Dronetag device (3.3V logic) |
| 3 | UART TX | Blue | Transmit of the Dronetag device (3.3V logic) |
| 4 | Ground | Black | Ground connection |
Pixhawk Telem Port
Most MAVlink-compatible flight controllers (such as Pixhawk) use JST GH 6-pin connectors that can be configured as UART/Serial interface.
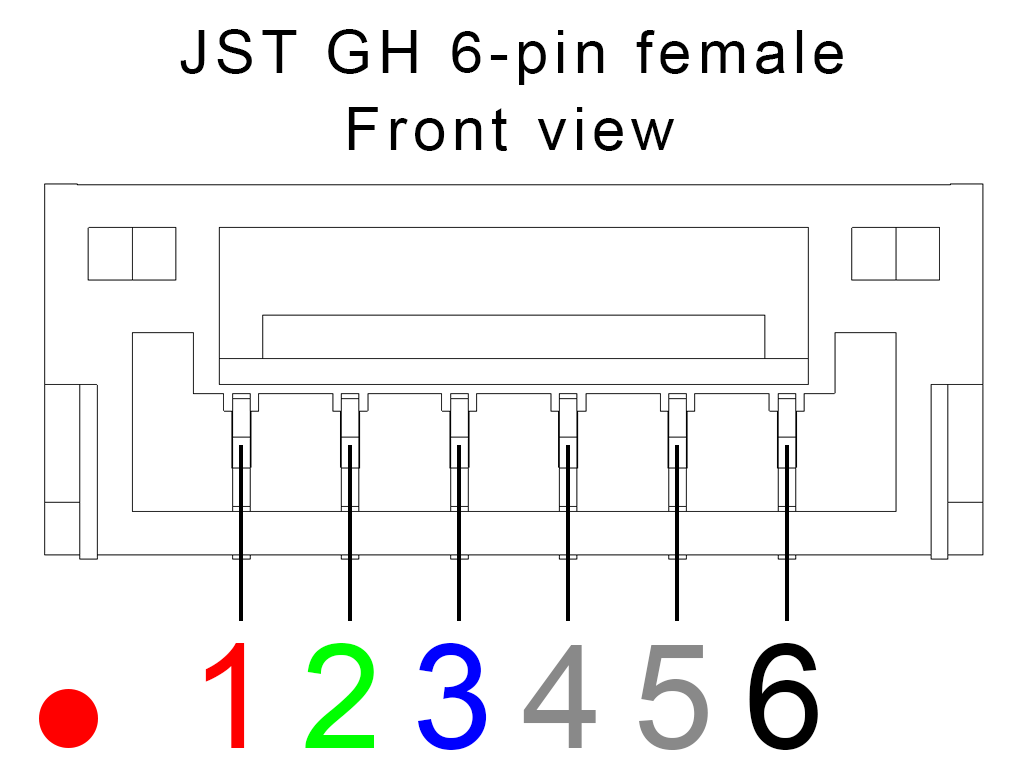
| Pin # | Name | Scheme Color | Description |
|---|---|---|---|
| 1 | VCC | Red | Supply from the flight controller (5V) |
| 2 | UART TX | Green | Transmit of the flight controller (3.3V to 5V logic) |
| 3 | UART RX | Blue | Receive of the flight controller (3.3V to 5V logic) |
| 4 | CTS | Gray | Flow control pin (3.3V to 5V logic) |
| 5 | RTS | Gray | Flow control pin (3.3V to 5V logic) |
| 6 | Ground | Black | Ground connection |
Beacon Connected to Flight Controller
The way to connect Dronetag Beacon to the flight controller differs based on the hardware revision of the device. You can find the revision code on the label on both the device and the packaging. If you are not sure what hardware revision your Dronetag Beacon device has, please contact our support team at support@dronetag.com
For the successful integration of your Dronetag device with the flight controller, only pin UART RX (pin 2), UART TX (pin 3) and Ground (pin 4) must always be connected. VCC (pin 1) may or may not be connected based on the hardware revision of the device (see the section below). Not following the instructions below may permanently damage your device and void the warranty.
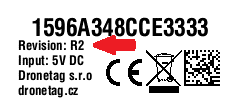 | Revision R2 |
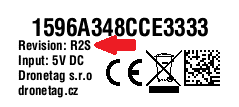 | Revision R2S |
Connecting revision R2S
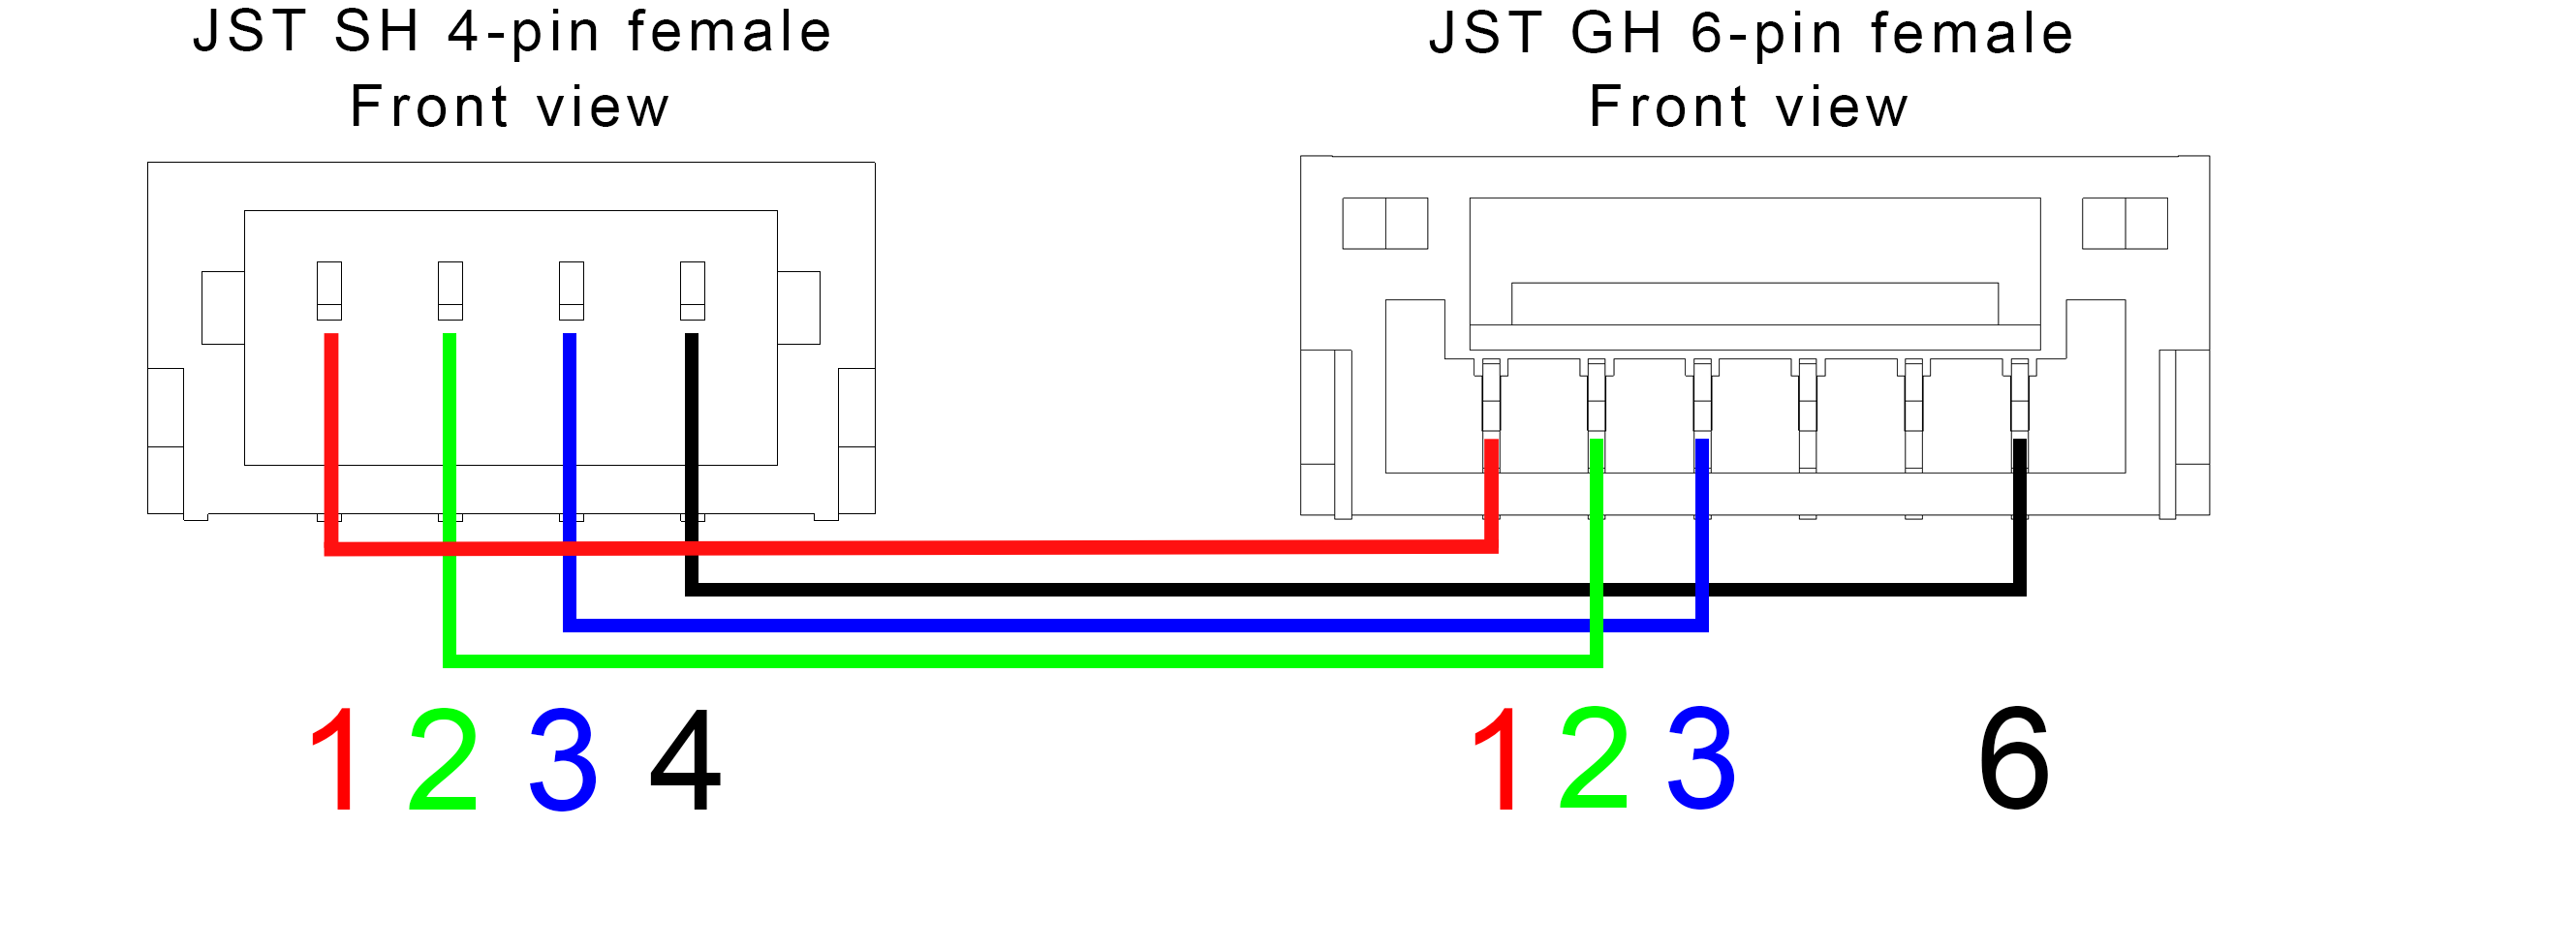
For this revision, pin 1 of the Dronetag Beacon extension connector is UART logic level VCC input. Supported logic level is in the range from 3.3 V up to 5 V. Dronetag Beacon extension connector pin 1 shall be connected to 3.3 V supply of the flight controller.
Connection example for R2S revision
 |
Connecting revision R2 and others
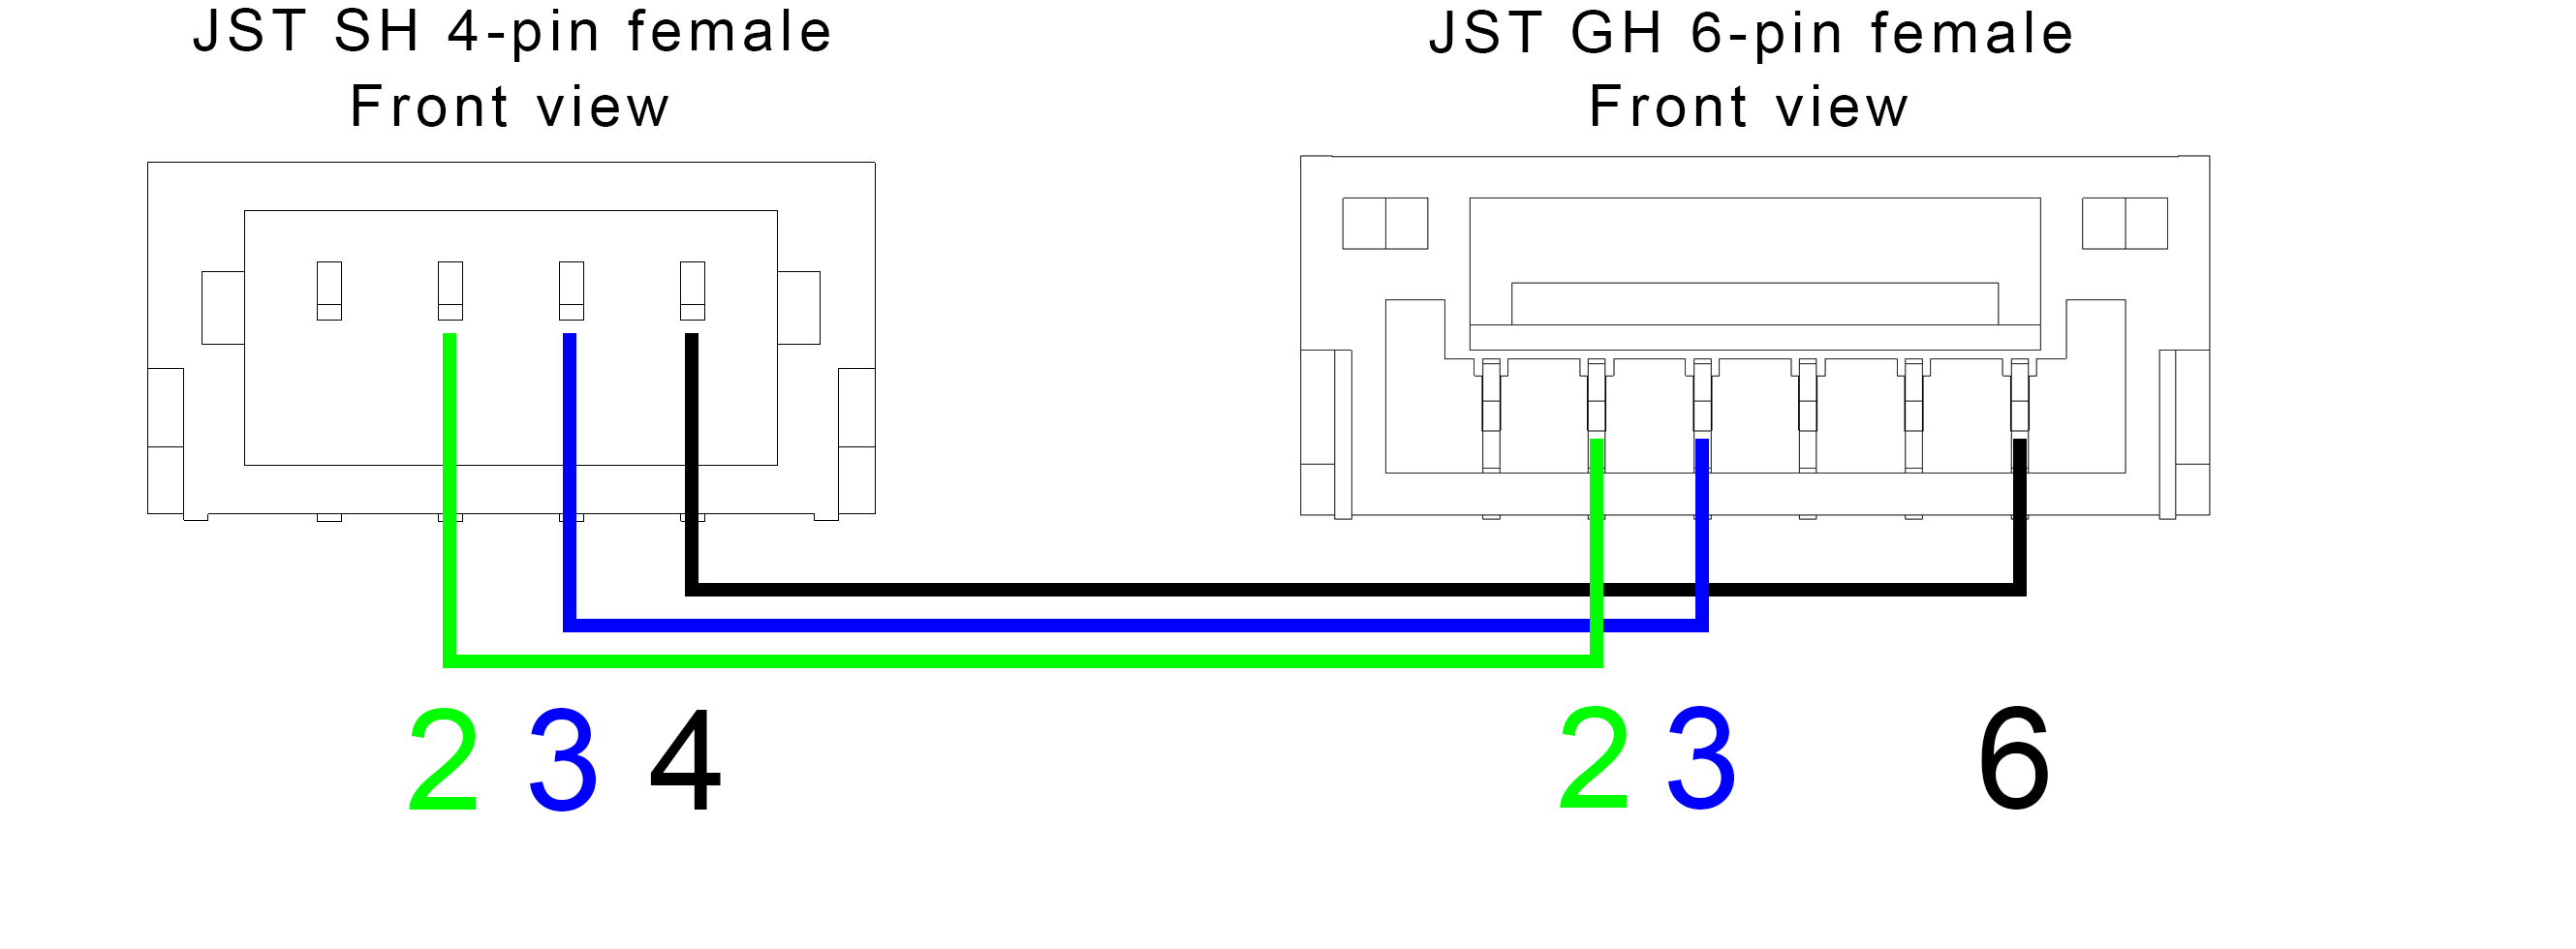
In these revisions, UART logic level is set internally by the Dronetag Beacon itself. Supported logic level is 3.3 V (5 V tolerant). Leave pin 1 of the Dronetag Beacon extension connector unconnected.
Connection example for R2 revision and others
 |
- Never put any voltage greater than 5.5 V to pin 1 (VCC pin) on Dronetag Beacon side!
- Always check that pin 1 (VCC pin) is handled correctly based on the hardware revision of the Dronetag Beacon
- Always check that your wiring of UART TX/RX is as described above.
- Ground pin must always be connected.
Settings on the MAVlink Flight Controller
On the flight controller side, you must ensure that you selected the following parameters on the UART/Serial port
- 115200 baudrate
- MAVlink 2 protocol
Using the MAVlink Data as Dronetag Input
The last step is to set up MAVlink as the GNSS input and optionally as a trigger for starting/ending the flight.
- Open up the Device Configuration
- Select MAVlink option as GNSS input. The internal GNSS receiver will turn off.
- If you want to have your flight state managed by the flight controller, enable the MAVlink flight control option in the General section
At this point, MAVlink data are read through the Extension connector and broadcast locally/sent to the Dronetag cloud. You can do a quick check if your integration was successful by disconnecting the Extension connector when you already have a GNSS fix on your drone. GNSS LED which was previously green should turn into pulsing orange.
- Dronetag flight can be only started when your drone has a GNSS fix.